
The first important step toward success with pansies is to purchase quality seeds from a reliable company.
One cannot hope to produce top-notch flowers unless a seed of top quality has been planted.
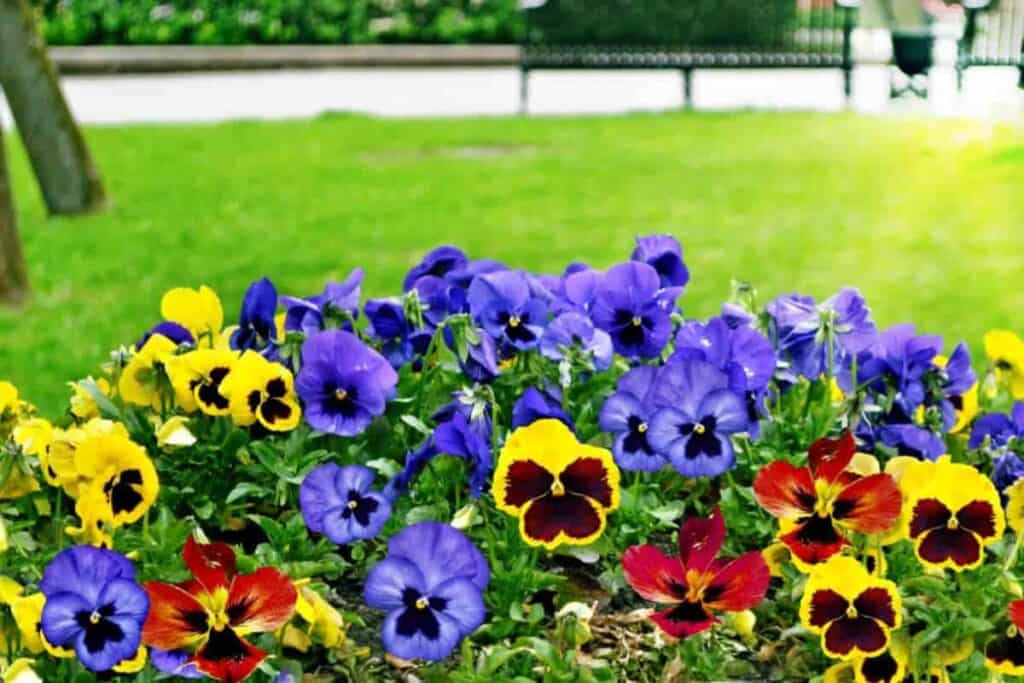
Giant Swiss, Super Swiss Giants, Super Maple Leaf mixture, Trimardeau mixture, Englemann’s Giant, and Dwarf Super Swiss mixed are the strains most commonly used.
Where Pansies Grows Best
Pansies grow best where they receive the early morning or late afternoon sunshine but are shaded from the sun’s intense heat at midday.
Fine flowers may be grown on the north side of a building, but the plants tend to grow leggy and spindly where they receive little or no direct sunshine.
Pansies may be grown in the shade of large trees, but tree roots quickly absorb the nutrients intended for the plants; thus, intense feeding is necessary.
Importance Of Soil
The soil must be loose and rich to produce pansies of good substance. Garden soil enriched with well-rotted manure, with enough sand added to make it loose and porous, is ideal.
Leaf mold, or well-moistened, granulated peat moss, is also a desirable addition to the soil since it helps to keep the bed moist and cool during warm weather.
Keep the ground loose by frequent cultivation, and allow no weeds to grow. The more frequently the flowers are picked, the more profusely they bloom. Conversely, if seed pods are allowed to form, the blooming is diminished.
Time To Sow Seed
Since pansies bloom more abundantly and produce larger flowers in cool weather, Springtime is the season when they are at their best.
To have them bloom at this time of year, the seed must be sown the previous July or early August.
The plants can be wintered in a cold frame. It is not cold weather that injures pansies and other hardy plants, but the quick changes from freezing to thawing that do the damage.
Types of Mulching
Mulching the bed with evergreen twigs and laughs, or some type of mulching that will not pack down and smother the plants, is one method of carrying them safely through the Winter.
Any mulch that excludes the air, however, is fatal to them. The cold frame is the more-dependable method in severe climates.
The seed may be sown in the open ground or in a cold frame where the plants are to remain permanently.
I prefer to sow them in flats, transplanting them later to their permanent location. In the seed flat more care can be given.
Seed Flat
The Seed Flat A seed flat 3” inches deep, 12” inches wide, and 24” inches long may be made from scraps of lumber and is large enough for planting one package of seed.
If the cracks in the tile bottom of the flat do not permit good drainage, small holes can be bored through the bottom, three to four inches apart.
Use three parks of spongy leaf mold mixed with one part sand. The mixture is sifted through a quarter-inch sieve to remove coarse matter.
It is then ready to be placed in the seed flat, which should be filled to within a half-inch of the top. Next, level the soil and press it rather firmly with a small board.
Then mark rows layout one inch apart and ⅛” inch deep, into which you drop the seeds, spacing them about one inch apart. Then level the soil’s surface, filling in the rows until the seed is covered.
After pansies have been flowering for several weeks, they often tend to become leggy and unruly in their growth. Cut the blooms with long stems, including foliage, to encourage new growth.
This will encourage new growth at the base of the plant and prolong the blooming season. As the new growth develops, an application of liquid manure is beneficial.
Cure Is Important
When the seed has been planted, cover the flat with a burlap sack; water through the sack until the soil is soaked and water seeps through the bottom of the flat.
The burlap covering prevents the seed from being washed out of the soil and is left on to hold in the moisture until the seeds have germinated and the seedlings have pushed through the soil.
The first seedlings may appear within a week, but others will take longer. Keep the soil moist but not soggy.
Protection from Warm Weather
Too much moisture may cause the plants to “damp off.” Therefore, if the planting is done during warm weather, it is better to leave the flat outdoors.
In a shaded location, protected by a pane of glass, to prevent hard rains from washing the small seedlings out of the ground.
The gloss must be raised above the flat’s edge to permit free air circulation. Remove the glass and water with a fine spray when the soil becomes dry, or pour water gently between the rows.
Transplanting Time
When the plants have begun to crowd each other in the seed flat, it is time to transplant them into their permanent bed.
If possible, choose a cool, cloudy day for the transplanting. Set the plants from 6” to 8” inches apart in rows 8” inches apart.
I use an old tablespoon or small plant trowel in transplanting. Keep the bed always moist until the planks are sturdy and strong.
A mulch of dried lawn clippings, partially decayed leaves, or peat moss effectively keeps the plants’ roots cool and moist.
Partially rotted straw from an old straw stack is also fine for this purpose. Place the mulch carefully around the plants, but never over them. During dry weather, soak the pansy bed twice each week.
Watch For Cutworms
Cutworms are probably the most destructive pest the pansy grower will have to deal with.
They cut off the planks just at the tile ground line, and if left alone, they will destroy most of the planting during the cool, moist weather of early Spring.
They feed upon the plants at night but burrow into the ground near the plant in daylight. There they stay hidden until darkness falls again.
Often they may be found by stirring the soil near the tile plant upon which they have been feeding — if a search is done for them shortly after daylight — before they have had time to burrow deeply into the ground.
They are so nearly the color of the ground that one needs good eyesight to find them. Cutworms often grow to be as large as a lead pencil and from an inch to 1 ½” inches in length.
They curl themselves around the plant’s stem to feed and usually will be found in this curled position.
Another method of destroying them is using poison bran mash, such as farmers use in their cornfields.
44659 by Mrs. Harry Rossetter