
Use steps to make your garden more convenient and interesting. Practical types do the dutiful work of getting you up and down from one level to another. At the same time, garden steps offer many artistic opportunities.
Friendly steps invite visitors along the path, whether up or down from the parking area to the front door, away from the house into the garden, or to vistas beyond.
The same steps might also lead to a service yard or play area. Depend on solid steps to transform a slippery grass bank into a firm footing.
Good garden steps hold so much interest that a landscape architect will frequently raise or lower a grade just to provide a valid reason for designing two or three low, broad steps into the plan.
First, they can be added to an otherwise flat area by excavating or filling it, thus creating a sunken garden or an elevated terrace. Then, flanked by a low stone wall, an evergreen hedge, or a fence, one or two flights of steps may be convincingly placed to fit the change in grade.
Steps close to the house, where straight architectural lines are best built, have similar lines. Because they are in constant use, build them solidly. For safety reasons, good materials to use are flagstones, concrete, and mortar-laid brick.
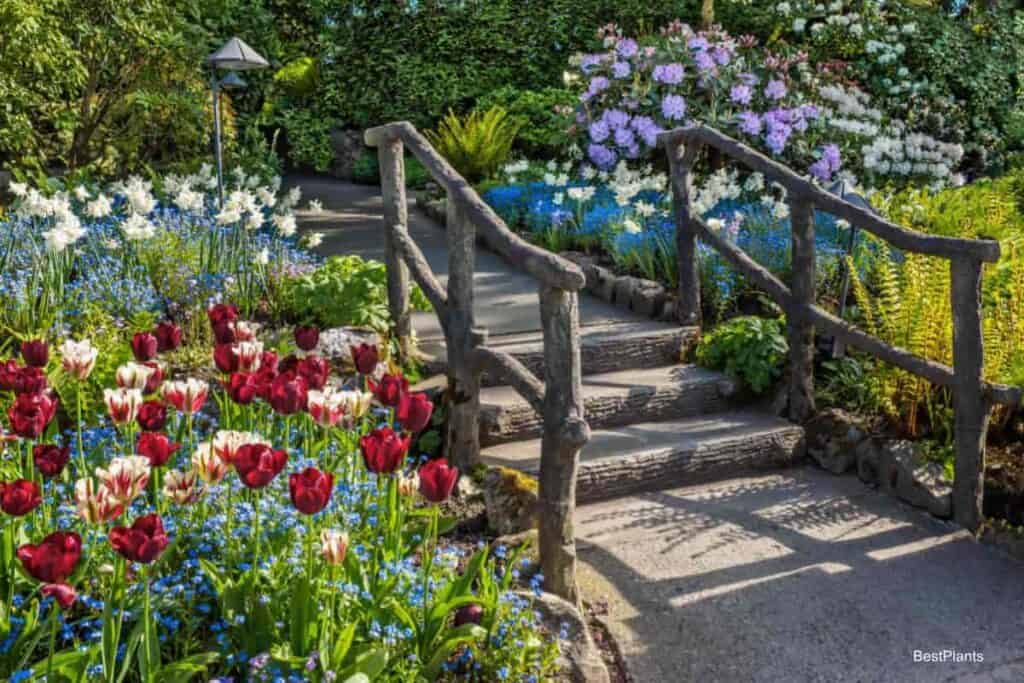
Detached a little from the precise lines of a building, gardens, and woodland settings adapt themselves to more natural steps, such as those made of logs, fieldstones, and railroad ties.
Build steps as wide as the path or doorway to which they belong. A comfortable width for a much-traveled path, such as that to the front entrance, is four feet. This width allows two people to walk side by side.
You can vary the dimensions of the steps to make them appear more inviting. One way is to make the lower treads of an upward leading flight substantially deeper than the upper treads. This is especially true on curved steps or those with treads that are wider at the base and narrower toward the top.
Another way to build a feeling of welcome is to slope one or both side walls outward. To create an even nicer impression of hospitality, plant the crevices or nearest patches of soil by steps with small vines like periwinkle (Vinca minor), Akebia quinata (chocolate vine), English ivy, or other suitable plants, preferably evergreen for interest in winter too. Early spring bulbs with white or yellow flowers are showy in this situation, too.
Marked The Beginning Of Steps
Because steps begin a break in ground levels, mark them to indicate this change.
To call attention to the drop or rise in footing, use a planting of some importance, piers or posts in adjoining walls or fences, a lamppost, a colorful vase, a potted plant, or small statuary. To leave the steps unadorned is to miss out on a chance to add a beautiful garden.
A general rule to follow in determining the proportions of steps is that “the broader the tread, the lower the rise,” and an old rule of thumb tells us that “one tread plus two risers should equal 27” inches.”
Since outdoor scale allows us so much more scope than indoor stairs, there may be a great variation in the sizes of garden steps. The varying width and depth of the treads at the bottom may even vary within the flight.
Outdoor steps are usually not as steep as indoor stairs, and a 5” or 6” riser may be found comfortable for walking up and down. Using our rule of thumb, risers five inches high would have treads 17” inches deep, or six-inch steps need 15” inch treads.
Generally, risers vary from five inches minimum to seven inches maximum, and the tread is 11″ to 18″ deep, with 12″ inches being the average.
A Landing To Help You Catch Your Breath
When the difference in ground levels is more than five feet, break the flight midway with a landing. The direction of the steps may then be turned at right angles or even curved back upon itself. This maneuver helps when the room is limited.
A long flight of steps may be narrower and steeper than a shorter one and still look well proportioned. Fortunately, most home plots require only short flights, and these adapt themselves to widened and lowered steps, which are the easiest kinds to blend into their setting.
Although it is important that the treads do not noticeably tilt upward toward the risers, there should be a slight forward pitch for drainage. Make the pitch towards the front no greater than one-fourth inch.
Some Steps Have “Noses”
When the step material is suitable, like flagstones or brick, for example, a tread may overhang the riser by one inch and thereby cast a pleasing shadow. This overhang is called a “nose.” The material used for the nose needs to be at least 2” inches thick so as not to appear frail.
Where freezing occurs, steps need to be built on permanent foundations below the frost line with footings. Detailed information about step construction may be found at your local library.
The more complicated types necessitate the use of a contractor. Two kinds of steps I’ve found to be easily constructed. Here’s how:
Large flat stones can be placed on level indentations up a grade. Leave the finished step in a firm, level position. Log steps are easy; moisture-resistant redwood is the wood of choice for this use.
If black locust is also good, treat it with a wood preservative. Logs are merely set in place, up a grade, spaced as far apart as necessary. They can be held in place by steel or wooden pegs. One foot of the log ends should be pushed into the bank to keep them in place and stop them from eroding.