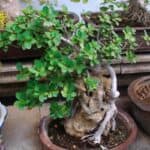
There’s nothing mysterious about growing miniature trees or shrubs.
We see countless examples of them all around us: the weed in the garden that is identical to the one growing along the roadside, except in size; the gnarled, stunted tree growing on a rocky cliff edge of the same species as the beautiful giant in the park.
The plant in the fertile garden soil, given plenty of moisture and food, grows to maximum size and height.
But the starved little plant along the dry, sterile road is dwarfed and misshapen because it must live with the bare minimum of food and water.
Growing Miniature Trees
The principle is the same in growing miniature trees for the patio or garden. The secret of keeping a tree dwarfed is the minimum food that will allow your tree to stay alive and healthy, permitting it to grow slowly.
Almost any small plant can be taken from its natural surroundings, put into a container, and grown as a diminutive.
Obtaining Miniature Plants
There are two ways you can obtain your little plant. Buy it or find and bring it home from the wilds yourself.
You run less risk of losing your plant if you get it from a reliable dealer. It has been conditioned to live in a small space, and few of the roots are lost when it is transplanted.
But if you wish to find your little wilding and bring it home, you will be put into more trouble and run a greater risk of failure. Almost any area where trees or shrubs grow will be a happy hunting ground.
Don’t, however, look in fertile fields or along moist ditch banks. These environments produce big, lush growing plants unsuitable for dwarfing.
Look rather in poor soil, rocky outcrops, dry hillsides, the edge of dunes, and desert areas.
Important “Don’t”
Here is where the first important “don’t” come along!
No matter how beautiful and interesting, don’t attempt to bring home a large tree or shrub. The shock of transplanting will very likely kill anything over 6” or 8” inches high.
Your best success will be with two or three-year-old seedlings—plants 4” or 5” inches high with several little branches.
Bring some extra soil from the area home with you. It will be needed in the mixture the tree will be planted in. Keep your plant moist on the trip home and place it in its container on the return home.
Always try to get your tree in fall or winter. Most growing things are dormant or partially so at this time and can be safely moved. Here is one of the advantages of buying your plant.
The nursery tree in a can doesn’t mind being moved any month of the year, and you can have the fun of experimenting any time the mood strikes you. Just be a little more careful and gentle in handling the roots if they grow.
Best Containers For Miniature Trees
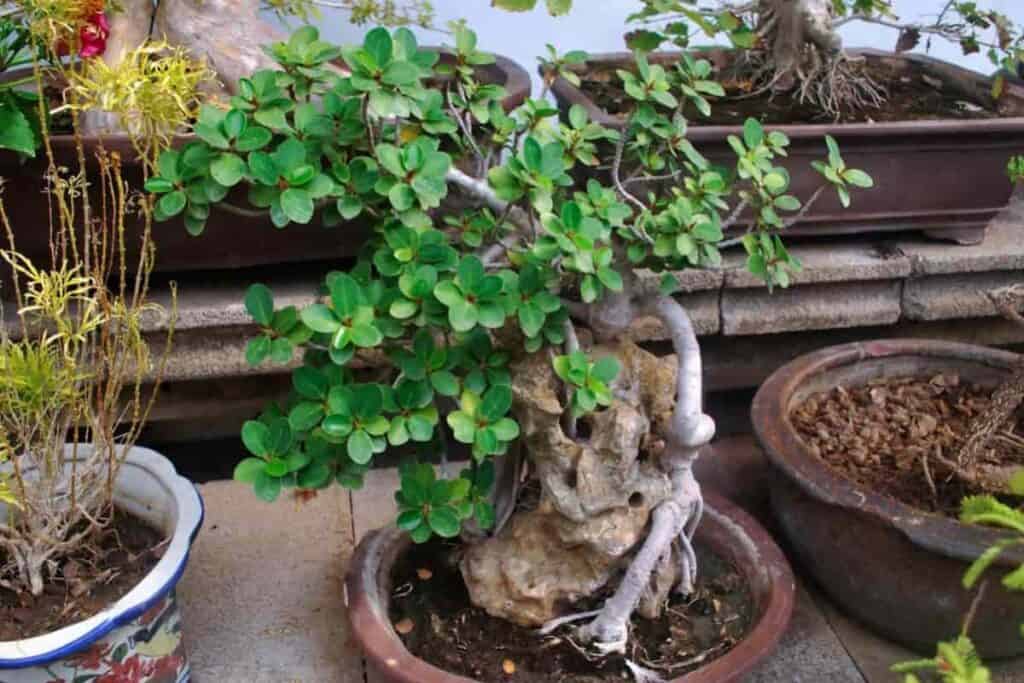
You are probably wondering at this point about those gorgeous ceramic containers in miniature trees that are always planted.
Ceramic bowls and shallow dishes in subdued colors probably make the most artistic containers for dwarf trees.
But we have found plastic bowls to be the best for first efforts. Later, as your tree grows and assumes a more interesting shape, you may want to invest in something more elegant.
Tones of brown, green, or gray are best. It is the tree you want the attention focused on, not the container.
Ordinary cereal bowls from the dime store are satisfactory. If you have a brace and bit or electric drill, you can make holes in the bottom for drainage. But we have found the easiest way is to heat a small soldering iron and melt the holes through.
It takes only a second with a good hot iron. I have even used a red-hot nail! However, it is done—don’t ever forget to make those all-important holes! Three at least, more if the bowl is large.
Steps in Making Miniature Trees in Bowls
The following steps will help you get your plant off to a happy start: EQUIPMENT: Bowls of various sizes:
- The four-inch bowl will accommodate a plant 3 to 4-in. tall
- The six-inch bowl will accommodate a plant 5 to 7-in. tall
- The eight-inch bowl will accommodate a plant 8 to 10-in. tall
- Ten-inch bowl will accommodate a plant 10 to 14-in. tall
- Plastic, bronze, or galvanized screening
- Sand
- Very fine gravel (1/8 to 1/4 in.)
- Sieve or piece of screen for sifting soil
Soil Should Be Dry and Fine
Use some of the soil you brought home with the plant. Proportions should be roughly 50% soil from the plant’s habitat, 40% sand, 10% leaf mold, or compost shredded very finely.
All these ingredients should be dry as they will go through the sieve faster.
Also, the dry soil is easier to work around the tiny roots without leaving air pockets. If your plant came from a nursery and had been in the can or pot for any length of time, don’t use the old soil.
Make a new mixture from 50% good garden loam and 50% sand. Flowering trees and shrubs require more organic material than evergreens.
For them, 50% loam, 20% sand, 30% compost, leaf mold, or peat moss.
Handle Your Little Plant Carefully
Shake as much soil off the roots as you can without injuring them. If the plant is dormant, you can gently wash almost all the soil from the roots. But if they’re growing and have new feeder roots, it’s best not to disturb them more than you have to.
The longer roots and those that are broken or bent can be cut off with a pair of scissors.
Roots often have to be cut so the plant will fit into the container. Spare the scissors as much as possible, though. Your little tree needs all the roots you can get into a small place to become established.
Cover The Holes in The Bowl With The Screen
Here is where plastic screening is best. It is soft, pliable, and flat even in a curved bowl. Next, sprinkle a quarter-inch layer of fine gravel over the screen and holes.
Tamp down well, then add a quarter to half-inch layer of soil mix. Now set the little tree in and gently spread its roots out in all directions.
Next, sift soil lightly around the roots. The plant should be set high in the container. The base of the trunk where the roots start should be even with or above the surface. Be sure there is no air space left at this point.
Sift Soil Around The Roots
As you sift soil around the roots, occasionally tap the container against the bench. This assures the soil particles work down into every space between the tiny roots. Tamp in and around larger roots with the linger.
Damp earth would be almost impossible to work in these small spaces. Water the plant with a fine sprinkler when all the roots are covered. Do this several times for several days because dry line soil is almost waterproof.
As the soil settles, add more until the container is filled within a half-inch of the rim. I like to build a mound of soil around the base of the trunk. This gives a more interesting effect.
Cold Protection
Keep your little plant out of the sun in summer, and protect it from freezing in winter for a week or two after transplanting.
After it becomes established, it will be quite hardy and needs protection only in severe weather.
Miniature trees are decorative on patios, terraces, along fences, atop walls, in rockeries, or just any place where a small container can be placed and seen to good advantage. Don’t try to keep your trees in the house.
They grow too long and spindly in this artificial setting. If you want to see them indoors, build a shelf outside a sunny window and place them there.
In summer, an east or north exposure is best because they might be injured by the hot afternoon sun.
In winter, move them to a south or west location. Be careful about putting them against a wall or fence where summer might become excessively hot.
They aren’t tender as many potted plants are, but they need more attention than trees in the open ground.
If you place them in the rock garden or on the terrace, their roots will grow through the holes, and soon, you will have big plants in little pots!
To prevent this, just slip a piece of tin, board, or saucer under the bowl. Lift them occasionally to see that the roots are staying home.
Pruning and Pinching
You may shape your little tree any way you wish by pruning, pinching out, or using wire.
Pruning is done in the spring and is employed to cut back long branches and shape the top.
The tips of growing twigs and branches are pinched out to make the plant more compact and bushy.
If it is a deciduous tree or shrub and the leaves seem too large for their size, pinch them off, and newer ones will grow in their place, but they will be smaller.
If they’re still too large, pinch them off again, and the next leaves will still be smaller.
Shape By Wiring
Graceful curving branches can be shaped by wiring. The wire should be strong and flexible but will hold its shape after bending. Be careful in wiring little branches because too sharp a bend can cut deep into tender bark.
Wiring is best done in spring when the plant is soft and pliable. But watch wired plants carefully so the loops of wire don’t strangle them.
Watering
In summer, water your tree thoroughly both morning and evening. Spray the water on foliage and branches. A fine drizzle spray is best. However, don’t water foliage in hot sunshine.
In desert areas, shade the tree in the afternoon, and it might need water in the middle of the day also. Remember, that little bowl is a small container for the roots of a tree, no matter how tiny.
Don’t Overdo Fertilizing
A miniature takes very small amounts of essential nutrients, especially nitrogen. An organic fertilizer such as diluted liquid manure or fish emulsion is good. If you have a desert plant, add a small amount of lime.
But forest trees and evergreens do best without it unless they come from alkali areas. One feeding in early spring and one or two more in summer should take care of your plant’s needs for the year.
Image/s (Page 14)
Pruning
Wiring
Gravel
Screen
Holes
44659 by Mary Paetzel