
I was first bitten by the insidious camellia bug 16 years ago. My wife was responsible. She asked me to drive her to Charleston, S.C., to get a debutante. Until then, I had thought a debutante was a well-bred young woman about to make her bow to society.
As our son was just 2 years old at the time, I could think of nothing we needed less than we needed a debutante.
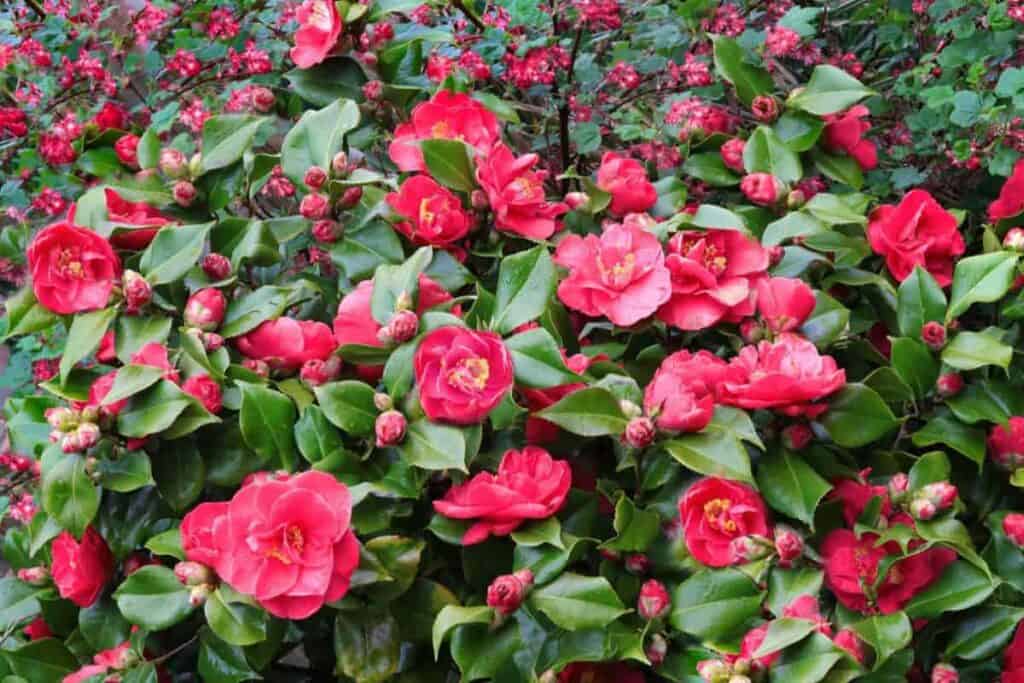
First Introduction To Camellias
Debutante turned out to be our first camellia plant, and I was more at sea with what to do for her than if she had been a well-bred young woman. I wanted to make her happy, and I wanted more of her family, so in my dilemma, my first step was to visit our local public library.
Then the news leaked out to camellia enthusiasts, and I got my first introduction to the unusual generosity of camellia lovers.
Robert O. Rubel of Mobile, Rudolph Anderson of Greenville, and the late Walter Allen of Summerville, S.C., were among the many who gave me advice based on their years of experience in camellia culture.
With their help, I bought my first collection of plants:
- Herme
- Sarah Frost
- Governor Mouton
- Pink Perfection
- Elegans Chandleri
- Tricolor
- Debutante
I began to root cuttings from these, exchanging them for varieties I didn’t have with other camellia growers.
Having bought sterling plants, I had invested in a far larger collection than I could ordinarily have afforded. I believed that camellia growing was a rich man’s hobby. I found it needn’t be.
My Secrets Of Planting Camellias
I have gingerly hoarded every seed and was soon planting them. This way, I grow much of my understock, which goes into grafting.
In about a year, I became a fledgling grafter, made a great many mistakes, and lost too big a percentage of my grafts.
But, through trial and error and keeping careful notes on my failures, I did learn the secret (explained below). In addition, a friend, R. B. Wilby of Atlanta, gave me scions of the recently imported Yunnan Province reticulatas, which I have successfully grafted.
I have accumulated several hundred varieties and six or seven hundred plants over the years. It took merely a warm love of flowers, patience, and work.
With knowledge of rooting cuttings, planting seeds, grafting, and raising my understock, my collection cost has been negligible.
Best Methods I Used
Here are the methods I use. There are others but these seem to work best for me.
Rooting Cuttings
WHERE:
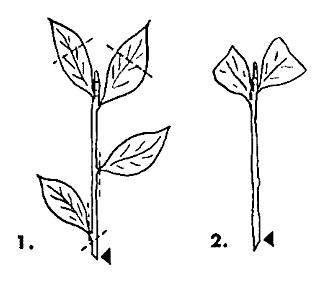
- Cut about 2″ to 4″ inches of terminal growth, leaving at least 1 leaf on the plant for new growth.
WHEN:
- After this year’s growth has hardened (in the Midsouth, generally June or July).

NEEDED:
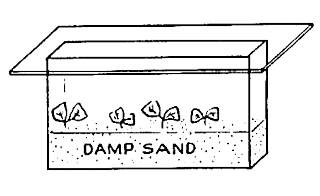
- Boxes or pots at least 8″ inches deep, coarse sand, razor blade, glass for cover, chemical rooting material (optional).
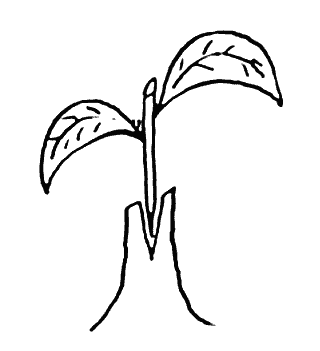
HOW:
- Dotted lines indicate cuts to make with a razor blade. Then cutting looks like this.
- Tamp wet sand tightly around cuttings.
- Keep in the shade. Water once a week. Syringe leaves frequently.
- When well rooted (generally about 3 months), replant in individual 3-inch pots, in regular camellia mixture, for instance, 1 part peat, 1 part humusy soil, and 1 part old compost.
Planting Seeds
WHERE FOUND:
- Seeds are found on most semi-doubles or single plants.
WHEN:
- Around September (in Midsouth), after seed pods burst open.
NEEDED:
- Peatmoss, gallon jar, razor blade, shallow flat of sand, a warm place, or greenhouse.
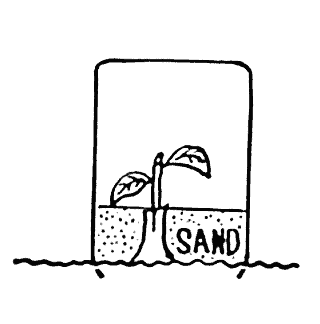
HOW:
- Put seeds in a gallon jar of peat moss, kept damp, not soggy, in a room of 65° to 70° degrees Fahrenheit.
- After the 10th day, empty the jar and examine the seeds, removing ones with 2″ to 3″ inch taproots. Return others to the jar to develop.
- Cut taproots to 1″ inch. Place seeds, root down, in the sand flat. Cover the root and half of the seed with sand, and keep moist in a warm room.
- In early spring, carefully remove 5″ to 6″ inch seedlings. Plant in 3″ to 4″ inch pots in the camellia soil mixture.
Grafting

WHERE:
- On hardy understock
WHEN:
- Before buds begin to swell (late January, early February in Mid-south).
NEEDED:
- Scion, understock, saw the sharp knife, piece of burlap, screwdriver, gallon glass jar, sand, rubber band.
HOW:
- Saw understock on slant 2” or 3” inches above the ground.
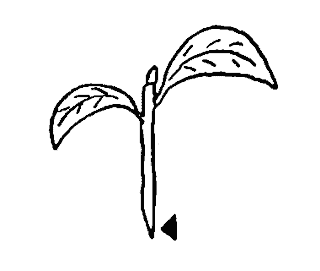
- Cut off all leaves except 2 at the top. Wedge-shape the bottom of the stem with a knife.
- Cut through the center at least to a depth of scion.
- Pry opens the cut with a screwdriver to receive the scion.
- Insert scion in split beside screwdriver, making certain cambium of scion and cambium of understock touch.
Care Of Graft
- Pack fine damp sand around the graft and above the union.
- Invert a wide-mouthed gallon jar over the graft, and cover it with burlap, so the plant is in a humid shade.
- Graft knits in about 6 to 10 weeks.
- Gradually remove the jar by first propping the upsides. Keep shaded.
- After 10 days, remove the jar.
- Treating it as a full-grown plant, it may bloom this year.
Terms
Understock: Hardy, well-rooted plant with a trunk at least 3″ to 4″ inches in diameter (sasanquas are fine). Scion: Strong, hardened terminal sprout of this year’s growth. You should have at least one leaf bud, two preferably.
Bark: Outer layer covering scion and understock.
Cambium: Layer of cells directly under bark, the medium through which union is made.
44659 by Na