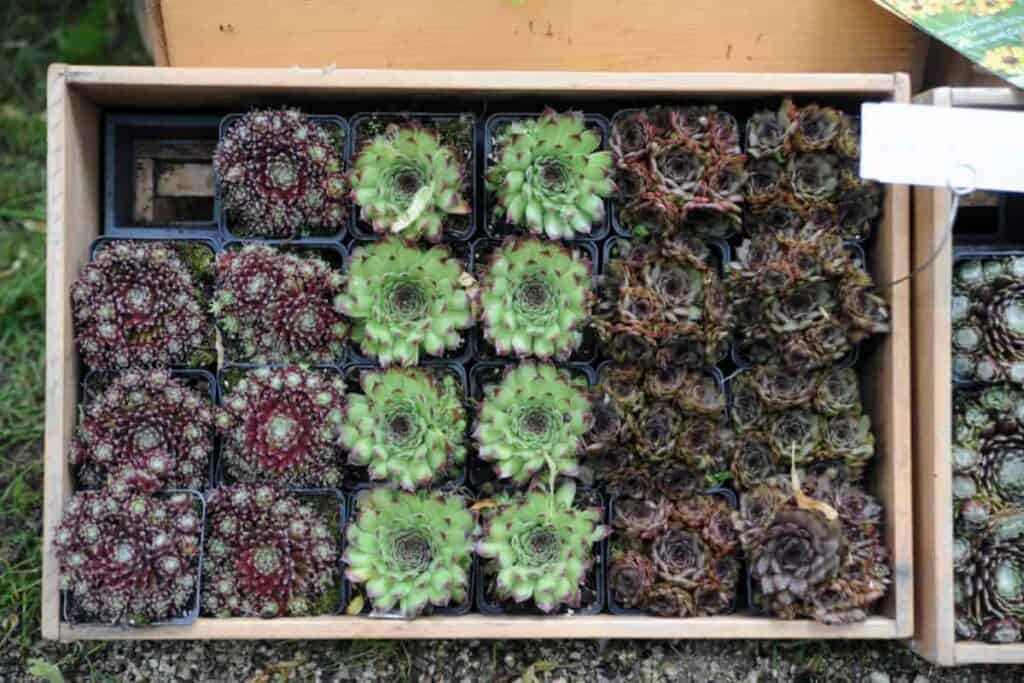
There are types to suit many gardening and flower arranging needs, with sizes ranging from 1-inch S. arenaria to 8-inch S. magnificum, foliage in bronze, red, purple, gray, and green, and growth in symmetrical rosettes or small globes.
Early gardeners used these endearing little plants on their rooftops, believing that they kept lightning from striking. The species most often used was the green and red S. tectorum, the common house leek. (Tectorum means “the roof.”) This grows fast.
Plant two or three, and you soon have a nice colony, for each plant keeps dividing from its rootstock and sending out offsets. However, dozens of more interesting and attractive kinds are on the market.
Sempervivums Are Easy To Grow
Give them good garden soil that drains well, and a sunny location. They soon become an established part of the garden. Most sempervivums are hardy.
However, I have found that hairy types like S. arachnoideum, the cobweb house-leek, and S. pittonii, may rot from snow here in our northern winters, so I put these kinds in the greenhouse or a cold frame over winter.
Sempervivums’ Advantage
Sempervivums show off the best advantage when several of the same kinds are grouped.
- Cluster them in low containers.
- Contrast row plantings against a layer of white pebbles.
- Plant them in redwood squares, triangles, or planter boxes.
- Set single varieties in squatty azalea pots.
- Use them to top stone walls, tuck them into garden corners, rock gardens, in chinks in walls, or walks.
- Put them in strawberry jars; or fashion them into attractive centerpieces. Or display them as I’m doing on pieces of driftwood or a porous cactus-wood stump.
“Driftwood” Comes For Free
My wooden planters are knots, slabs, small stumps, or other pieces of decaying wood I’ve picked up on fishing trips or vacations through woods or deserts. They are lightweight, easily moved, and, best of all, they cost nothing!
Select pieces with ridges, crevices, and hollows in them for the planting soil will be wedged into these spots. Before planting them, toss the wood into a tub of hot soaps or pour boiling water over it to kill insects it may be harboring.
For a natural effect, use the wood as it is, without painting or refinishing. For example, if you work with a stump, invert it, so the root end becomes the planter top. This gives a nicely balanced planting with a look of stability.
Pack all hollows and holes full of moistened garden soil into which you have mixed a generous amount of damp peat moss. Tamp it in with a thin stick.
Tack a layer of sphagnum moss or sheet moss over the soil to keep it from washing away. Now you are ready to plant your sempervivums.
Large Plants Are The Stars
Use a table fork or a small pointed stick to make planting holes in the moss. Then, plant the sempervivums into the soil-filled areas.
I like to use large sempervivums such as eight-inch red magnificum, dark green ‘Havana,’ or green and copper soboliferum, for the basic design.
Miniatures and small ones such as red-toned ‘Alpha,’ silver-haired arachnoideum, and emerald green arenarium make perfect fillers.
Trailing sedums and Kenilworth ivy add grace to new plantings and can be removed when sempervivums colonize.
Semi-Shaded Area To Establish
Set the finished plantings in a semi-shaded area to become established. Water once or twice a week with a sprinkling can or fine spray so the new plants won’t become dislodged. It usually takes such plantings about a month to become established.
You can tell when a plant is firmly entrenched by gently tugging. If it dislodges easily, leave the planting another week or so to settle in.
Once established, the planter can be set in any sunny place. A patio, porch, or pebbled surface makes a good background for it. Water it as often as needed with a spray from the garden hose.
Fertilize the planting monthly by pouring dilute liquid fertilizer directly on the wooden base, making sure the wood is moist first, so it will absorb.
These novel planters are ideal for showing off a collection of sempervivums, much better than in a garden bed, for instance, where the tiny species might be lost. I treat my plantings something like an add-a-pearl necklace.
I have them planted with several varieties, and when my budget can stand buying one or two new ones, I simply add them to the wooden base.
You’ll find many uses for these portable planters. I keep mine beside the patio. Here guests enjoy choosing their favorites from the many kinds planted on the driftwood.
Sempervivums For Table Centerpiece
I also use sempervivum centerpieces for the patio table, with the rosettes mounded in a compote dish.
Add a layer of pebbles for drainage in the bottom of the dish, then fill with soil that is half good garden loam and half sand. Finally, cover the soil with sphagnum or sheet moss, tucking it around the inside of the planter.
Plant and water it just as you would the wooden planters. If planted in early spring, the dish drips fairly with little new offsets by mid-summer. Replant the sempervivums into the garden in early fall to save them over the winter.
How To Multiply
Propagate sempervivums by removing the small stolons, runners, or little ball-like offsets. They can be planted directly into the garden, pots, or flats and will soon be rooted.
You can also increase your collection by planting seeds, which several specialists list.
Your plants may produce starry white, pink, red, or yellow flowers and also form seeds. The plants die after flowering, but the offsets live on.
There are perhaps 25 species of sempervivums, plus dozens of hybrids and varieties.
44659 by Peggie Schulz