When maintenance becomes too burdensome, gardening ceases to be a pleasure. My idea of the straw that breaks the camel’s back is a businessman who comes home tired after a day’s work and then has to put in a couple of hours at the end of a garden hose.
When we built our home, I decided that the one chore that could detract measurably from my enjoyment of the garden would be reduced to the lowest common denominator—the little matter of watering.
In all my life, I had never threaded a single length of pipe, and pipe wrenches were as foreign to me as surgeons’ scalpels.
Picking up a copy of one of the garden magazines, I noticed an advertisement for a concern that manufactured sprinkler heads and valves, offering free plans to homeowners as a part of their merchandising service.
I had a contour drawing of my property which showed the location of the house and garage, and I sketched in the proposed walks, paths, lawn areas, and projected plantings, and sent in this rough drawing.
Detailed Plan For The Sprinkle System
Back came a detailed plan showing the suggested location of control valves, sprinkler heads, pipe sizes, and a list of needed materials.
From then on, it appeared to be a simple matter to buy the necessary pipe and fittings and install the system as they had planned. So I bought the necessary tools and started to work, and lo and behold, as the Good Book says, “that which we feared has come upon us.”
I had the necessary material and the tools—but I did not have the experience, and I had the usual forlorn feeling that creeps over one who is about to tackle something he knows nothing about.
Just one day of threading pipe, fitting tees, elbows, and nipples, I felt I had stripped the plumbing profession of its shroud of mystery.
The physical assembling of an automatic sprinkler system is nothing to deter a home gardener from enjoying this modern convenience.
Consider The Tools Required
First, let us consider the tools required to install your system and what you will have to invest in before you can start to work— if you prefer owning tools to renting or borrowing them.
Pipe Vise
The first requisite is a pipe vise, suitable for holding pipe from 1/2 to a maximum of 1 inch in diameter.
The pipe must be held securely in position so that it can be cut, threaded, and reamed, and that’s why you need a vise.
You will find two types of vises: jaw vise and chain vise. You should be able to buy the former for about $10.00; the chain vice runs a little less.
Pipe Cutter
Secondly, you will need a pipe cutter to cut pipe up to 1″ inch in diameter. You will need the pipe cutter to cut pipe of the various lengths called for in your system layout, and that is the principal excuse for squandering $6.00 on a pipe cutter.
Pipe Reamer
Third, you will need a pipe reamer, giving you financial pangs to the tune of about $3.50. A pipe reamer is a cone-shaped gadget that fits into a brace and is used in reaming out the ends of sections of pipe that you have cut to size with a pipe cutter.
The reason that you need a pipe reamer is that the operation of pipe cutting reduces the size of the opening, which cuts down the volume of water that can pass through.
Then, too, these unreamed cuts collect calcium and other foreign material in the water and, in time, will clog pipes and eventually choke off the flow of water.
Now, before we leave this little matter of pipe remaining, you will recall that I said you would need a brace to use it. I am not including the cost of a brace in the total investment in tools because I couldn’t imagine a homeowner without a brace and a few bits.
Pipe Wrench
You will need a pair of pipe wrenches to obtain a tight fit between the pipe and fittings. I would advise a pair that will handle pipes up to 1 ½” inches in diameter.
That is about the largest size of pipe the homeowner will ever handle, and it is much better to pay the slight additional cost to get wrenches large enough than to buy a pair that will handle only smaller pipe and then later find that you require a larger set.
Why two wrenches? Because you must hold the fitting in a given position while you screw in the pipe. The force of the two wrenches is always applied in opposite directions.
You do not need to buy the most expensive wrenches for your home use. The cheapest 14-inch pipe wrench—the size that handles 1 1/2-inch pipe—will run about $2.70, and the best quality retails from $3.50 to $4.00.
The quality of the jaws largely determines the price. The harder the steel, the longer the teeth will remain sharp.
A plumber would buy the best—but you will probably never wear out a set of even medium-priced Stillson wrenches.
Pipe Threader
Now we come to the most interesting of the tools you will need, the pipe threader, usually called “stock and dies.” Here we come up against the most expensive tool required, and you must use judgment.
If you are tool conscious, you can invest $25 in stock and die, but a little restraint will enable you to keep the investment under $15.
Before you get far into the mechanics of installing a sprinkler system, you will find that you will need to handle only three sizes of pipe in the average system—1/2, 3/4, and 1-inch—and good sense might dictate that you buy a pipe threader as the one illustrated, which is fitted with these three sizes of dies.
Mine cost about $20 and had the distinct advantage of having three dies permanently fitted, thus preventing the need to change dies in a stock every time you need to thread a different pipe size.
Before you start using your pipe threader, put some cutting oil on the end of the pipe to be threaded and on the dies. You can thread pipe without oil, but it is harder work, dulls the cutters, and often tears the threads because of excessive drag.
A can of cutting oil will cost you about 50d, and lest you be accused of developing a plumber’s amnesia while at the store, buy a can of pipe joint compound.
Control Valves
In selecting control valves, don’t buy an ordinary globe valve or gate valve with a handwheel; you will have to stoop whenever you want to open a valve. Instead, use brass angle valves specifically designed for sprinkler system use.
They will cost you a little more but are worth the difference. The more you value convenience, the more you will appreciate a brass angle control valve that you can turn on with a valve key.
Installation of Sprinkler System
The installation of a sprinkler system starts at the control valve, which is mounted on a nipple or riser connected to your supply line.
The most desirable type of control valve has a brass union on the outlet so that the sprinkler line can be easily disconnected at the valve should it ever be necessary to disconnect to service either the valve or sprinkler lines.
The main lines of your sprinkler system should be of a 3/4-inch pipe, and in order not to restrict the volume of water passing through the valve, I prefer to use a 1-inch valve to supply a 34-inch sprinkler line.
The control valve or valves should always be located so you can turn on the sprinkler system without getting wet while the sprinklers operate.
Locations For Installation
Ideal locations are near the front or rear entrances —many times, several control valves can be located at one spot to operate several systems without unnecessary walking.
It’s mighty comforting to step onto the porch, turn on a sprinkler valve, go back inside, and enjoy the evening paper while the system sprinkles your lawn and garden.
Beyond the control valve, the installation is primarily a matter of assembling short pipe lengths, reducing tees, elbows, standard tees, and 90° elbows, nipples, and sprinkler heads.
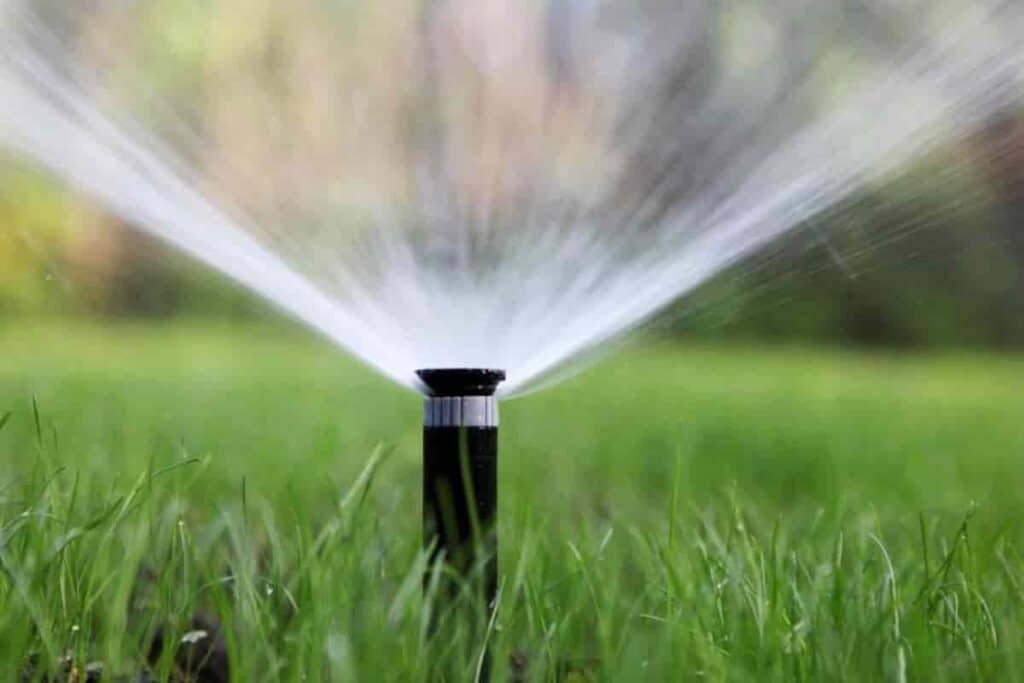
Types Of Sprinkler Heads
Sprinkler heads employed in the home garden are usually of four types: full circle, half circle, quarter circle, and third circle.
Full circle heads are generally used to cover areas out in the garden—at least 20’ feet removed from sidewalks and building entrances.
Half-circle heads are used along sidewalks and curbing. Quarter circle heads are set in 90° corners, and third circle heads are used to cover angles over 90°, yet not sufficient for a half circle head.
When your system is installed and all sprinkler heads fitted, don’t cover up the pipe trenches until you have turned on the valve to ensure you are getting an even distribution of water.
If you have miscalculated the placement of any of your sprinkler heads, you may wish to make changes to get an absolutely uniform water distribution.
If there are any dry spots—or portions receiving too little moisture—correct the error before filling the trenches and putting in a new lawn.
Advantages of Automatic Watering
In addition to pure convenience, automatic watering has two other advantages that are almost equally important. One is uniformity of coverage, and the other is economy.
In automatic watering, you eliminate the human element at the end of a hose, which tends to direct more water to favorite flowers and shrubs and less to those that might not be riding in such high favor but may be equally thirsty.
Automatic sprinkling is economical because it applies water more advantageously with less runoff and waste. Hence the better use of water is reflected in lower water bills.
This is no fiction because I have compared my water bills with friends who water with a hose less than half the area I irrigate, and their water bills are nearly always considerably more than mine.
44659 by O.E. Hopfer