Propagating units like those shown here, which you improvise yourself or purchase ready-made, go a long way in helping you successfully start new plants from seeds and cuttings.
Their major purpose is to provide constant moisture in the rooting or seeding medium and to keep the air humid.
Vital Factor In Rooting Of Cuttings
Dry air or lack of moisture can spell the difference between success and failure. Warmth is also a vital factor, especially in the rooting of cuttings.
When the temperature of the rooting medium is between 60° and 70° degrees Fahrenheit, the chances of root development are considerably greater than they are without bottom heat.
One ready-made unit has electric heating cables that ensure steady bottom heat.
Those without heating cables should be placed in a room where the temperature is within this range or, if placed outdoors in spring or fall, should be moved inside when the temperature goes much below 60° degrees Fahrenheit.
Essential Light
Light is essential for the rooting of cuttings because the leaves need light to manufacture the food necessary for root growth.
Most seed will germinate without light, but seedlings must have light as soon as they appear.
Propagating Unit
During the time cuttings are rooting or as soon as seed germinates, a propagating unit should be kept in a bright window or in a partly shaded spot in the garden, never in full sun.
Too much sun causes excess heat to build up under the humidity cover, retarding plant growth.
After cuttings have rooted or when seedlings appear, take off the cover and gradually expose the cuttings or seedlings to the sun, hardening them before transplanting them to pots, flats, or the garden.
(When the cover is removed, the growing medium dries rapidly. Water regularly or replenish the reservoir if the growing medium is kept moist by sub-irrigation.)
Some ready-made units have a light on top which does not cause overheating of the propagating unit when the humidity cover is on and yet gives ample light for continuous growth.
Fertilizer To Cuttings
It is wise to apply a dilute liquid fertilizer to cuttings at about two-week intervals if they must remain in the propagating unit after rooting occurs.
The same applies to seedlings. The rooting medium supplied with some of the ready-made units is fortified with fertilizer.
Homemade Propagating Unit
Homemade propagating units shown here are recommended by horticulturists at the University of Florida but are useful to gardeners everywhere.
In all probability, you have materials on hand to make one or more.
No. 1
An aquarium or goldfish tank is easily converted into a propagating unit. Simply cover the bottom with an inch of small pea-size gravel for drainage.
Over this place, a 4-inch layer of any good propagating material, such as sharp sand or vermiculite for cuttings and sphagnum moss or vermiculite for seed.
Moisten the propagating material and then place cuttings or sow seeds. Stretch a sheet of clear plastic or cellophane over the top and tie it around the tank with string.
A large polyethylene bag may be slit open for this purpose. The cover maintains humidity within the tank and keeps the growing medium from drying and out. Arid hasten rooting or seed germination.
No. 2
A shallow clay pot 6” to 8” inches across, called a bulb pan, makes an excellent propagating unit.
Plug the drain hole with putty, chewing gum, or a cork, and fill it half full with sand. Then press a 2”-inch clay pot, its drain hole plugged, into the center of the partly filled bulb pan.
The rim of the small pot should be level with or slightly above the rim of the larger one.
Add more sand, moisten it, insert cuttings, and fill the small pot with water. The water will seep into the sand, keeping it uniformly moist.
No. 3
A polyethylene bag is an amazingly simple device for propagating such easy-to-root cuttings as those from chrysanthemums and coleus or leaf cuttings of African violets.
Wrap moist sphagnum moss about the base of several cuttings and place them in the bag, closing and tying the top.
Punch three or four pencil-thick holes in the bag to admit air. Do not disturb the cuttings until you think roots have formed.
A variation of the polyethylene bag method is shown in sketch No. 3, right. Instead of wrapping the cuttings in moss, insert them in a clay pot filled with the rooting medium of your choice.
Wet the medium, place cuttings, and tie a plastic bag with thin sticks over the pot. The unit also works for seeding.
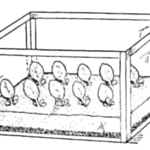
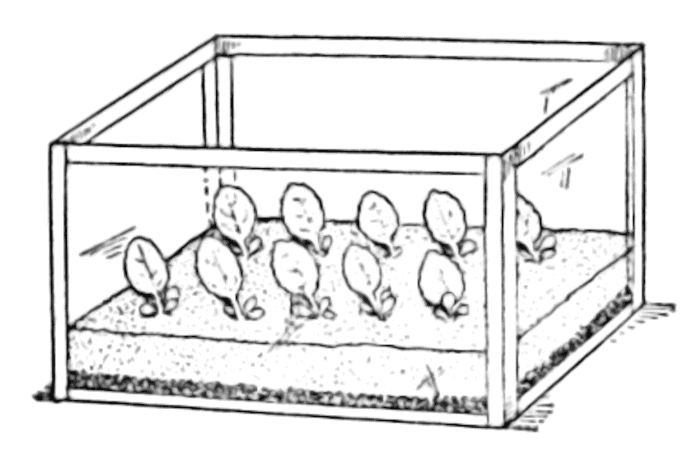
No. 4
An apple box with one side cut down to 6” inches will house many cuttings or seedlings.
Line the inside of the box with aluminum foil to prevent the rooting medium from running out of the cracks. Place 4” inches of moistened sand, sphagnum moss, vermiculite, or another medium at the bottom.
Insert cuttings or sow seed. Then cover the top with polyethylene held in place with thumbtacks.
No. 5
Cut the top from an empty gallon of oil, scrub it clean, punch holes at 3-inch intervals around the middle, and put in pea-size gravel to within ½” an inch of the holes.
A 1″-inch layer of sphagnum moss goes over the gravel and is filled to within ½” an inch of the can’s rim.
Wet the sand until water runs out the holes. As moisture evaporates from the sand’s surface, more moves up by capillarity from the reservoir below, keeping the sand continuously moist.
Additional water may be needed at 10- to 14-day intervals until cuttings (about twenty in a one-gallon can) take root and are ready for transplanting.
44659 by Oscar Keeling Moore