Annual asters rank among the half-dozen most popular garden annuals in America. Called China asters (Callistephus chinensis) to distinguish them from native hardy types, they have been standbys in American gardens for 50 years.
They have surely kept pace with the times and are available in many new forms to fit the needs of mid-century gardeners from the Atlantic to the Pacific.
There are long-stemmed Ball asters, the incurved florists’ type bred primarily for cutting; shaggy types, like Cregos and Early Giants, also for cutting (these cutting types also have the vigor to make excellent background plantings);
Shorter varieties (about 18″ inches) like the crested Princess asters and the busy Bouquet asters are suitable for beds and borders and cutting, and even strictly dwarf asters for soft bedding and foundation plantings. Catalogs list these and even more kinds that can fill many late summer garden needs.
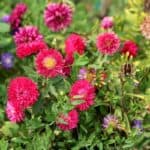
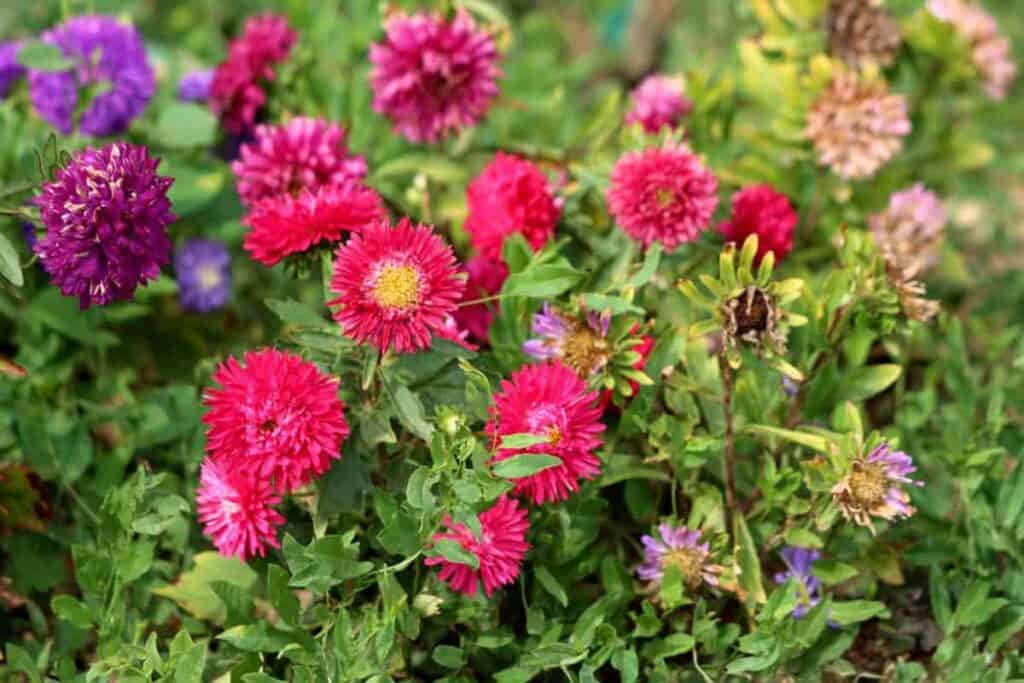
China’s aster colors include deep blue-violet, lavender, purple, clear light azure blue, intense rose red, clean pinks in several shades, and pure white. In addition, there is a soft shell pink that is especially effective in arrangements.
Where Modern Annual Asters Came From
It seems strange that our modern annual asters came from China since we have many native perennial asters in the United States. Still, such is the case. All our present varieties came from a single Chinese species brought to the Western world over 200 years ago.
It’s another instance of a single obscure wild species being discovered, brought to new lands, and intensively bred to produce the many types we know today.
Callistephus chinensis was first introduced to the West in 1731 when seeds were sent to Paris by a Jesuit missionary. The plants were about a foot tall, non-branching, and bore single 3″ inch blue, violet, or white flowers.
Early French breeders produced a double form with ray-like petals, while Germans working in the same period developed quilled doubles.
These first doubles were stiff and formal, and it was not until 1886 that the loose, less formal Comet type was introduced. This new Comet form gradually won the popular favor, until now, we see few stiff double varieties in the trade.
American breeders brought out the first branching asters in 1893, subsequently taking over most of the world’s aster breeding and seed production. Today China asters rate high in favor of America and Europe alike.
Greenhouse varieties are becoming more critical yearly as cut flowers due to their excellent color range, long-keeping quality, and wide bloom season. Specialists can flower them on any day of the year.
About Growing Them
Asters are neither the easiest garden flower for you to grow nor the hardest. For best success, you should know what you’re doing.
By following the basic rules of aster culture, gardeners of most regions can certainly produce quality asters to reward their best efforts.
You can start either with seeds or with plants. If you sow your seeds, be sure the soil, the flat or box, the tools, and the germinating location arc sterilized.
Sterile seeding medium can be purchased, or you may “cook up” your mix in the oven, making sure to reach at least 180° degrees Fahrenheit for 30 minutes within the soil mass. Use a meat thermometer to follow the temperature.
Be sure your seeding medium is light and loose, either soil with about 50 percent screened compost or an inert medium like vermiculite. Have it moist but not muddy before sowing.
Then taking a section of yardstick or lath, make trenches across the box by pressing the thin edge down about an inch. Sowing the seeds thinly in the row of a quarter inch between seeds is none too muchóand, barely covers it.
If asters give you damp-off troubles, you better plan on treating the seed box with one of the new Panogcn drenches the clay before sowing.
Don’t let up on your sterilizing even if your water; however, it’s not .vise to depend too heavily on the drench alone.
After the seed is sown, mist it or sub-irrigate it to reach maximum moisture levels. Then try this trick to maintain moisture: locate a sterile polyethylene bag and slide the box inside.
Fold the end under, place the container where temperatures stay between 60° and 70° degrees Fahrenheit, and wait three to five days for the seeds to sprout.
When it begins to grow, make sure it receives the whole light. Then, after the seedlings are well up, remove the bag and drop temperatures, if possible, to around 50° to 55° degrees Fahrenheit, maintaining full sunlight and plenty of fresh air.
This is your assurance of short, stocky plants resistant to damp-off.
An Early Start
You will need a cold frame, hotbed, or greenhouse to grow the best asters. It would help if you sowed seed about 6 or 7 weeks before setting plants in the garden (garden planting comes after the last frost date).
Giving them 2 to 3 weeks to sprout and be ready for transplanting means the seedlings will be glad to transplant about a month ahead of garden planting time.
This is just about the correct date to start a cold franc. Hotbeds and greenhouses will be in operation before this, of course, but it’s just as well not to rush things with asters as they proliferate that they’d be too big for best transplanting.
Transplant aster seedlings to flats, spacing them about 2″ inches each way, as soon as the first true leaves unfold. This enables you to handle the plants without severely checking them, something to keep in mind at every transplanting stage.
Here is where you’ll be glad for having used a light, loose seeding medium óthe roots come apart almost intact. Again, transplant the seedlings into sandy humusy soil for easy separation.
Have the soil moderately moist, neither so wet that it is sticky nor so dry that it wilts the seedlings.
Be sure to water the seedlings thoroughly the first time after transplanting – go over the flats several times until you’re sure all the soil is moist.
Then put down that sprinkler, and don’t use it again for days until the soil is dry and the asters begin to flag.
It’s essential to avoid meddling with nature’s water balance during these first few days until the transplants are big enough to “pump out” the excess should you inadvertently over-water.
For premium quality aster plants, use two ¼” inch pots or bands. You might try some “Jiffy-Pots,” the new peat moss pots that let roots grow right throughóyou plant pots and all in the garden.
However, if you transplant seedlings, keep them shallow. It’s tempting to set them too deep, especially if they’re stretched in the seed box. Deep planting invites weak growth and stem rot.
The proper planting depth is so shallow that half the seedlings fall over at the first watering! This is no jokeóthe worst kind of transplanting is setting seedlings so deep that they stand up like telephone poles.
Keep transplants in full sun at all times. A week or two before setting-out time, they may need a shot of complete fertilizer to keep them growing. And at this robust stage, they take quantities of water. So water thoroughly goes over each flat twice and checks the apartments daily in bright, drying weather.
Like increasing numbers of gardeners, today, you may prefer to buy started plants ready to set in the garden. When you shop for aster plants, look for lots of leaves. The best are dark green, growing actively, and well-fed.
They should be hardened to stand the outdoor weather but not excessively checked and yellowed like one sometimes sees. Look too for the root area allowed for each plant, and avoid those squeezed tightly together.
A Suitable Place
In choosing garden locations for asters, look for places with plenty of suns and moderately rich soil.
Space the tail varieties 12” to 15” inches apart – they will fill every crevice of the bed with flowers even at this spacing. Shorter types require 6” to 9” inches between plants.
When planting asters in their final garden location, be sure not to make it their last resting place by setting them so deep as to invite rot.
Try to preserve a sound root system when you separate the plants. By having the soil quite moist, you will be able to keep lots of it on the roots during the planting process.
You can separate the root systems with your fingers working underneath or by slicing between plants with a knife or mason’s trowel.
One suitable method is to cut 4 or 5 days before you set them out, so the wounds can heal, and new roots begin forming.
Again after this move, the first watering is essential. Loose freshly dug soil takes a lot of moisture to soak up thoroughly and settle in around each plant’s root mass.
Health Program
During the garden life of asters, there will be the normal care, weeding, general insect control, staking, and perhaps a midsummer side dressing. That should pose no problem. But asters have two unique soft spots that you will want to watch carefully wilt and yellows.
Neither of these troubles is invincible nor even overly challenging to deal with, so you know what to do and do it.
Wilt is caused by a fungus that lives in the soil. Symptoms on asters are a rotting of the stem from the base up, followed shortly by the complete demise of the affected plants. This is why sterilizing the seeding soil is so important.
The wilt organism appears to persist for several years even where asters are kept off the ground, so the best solution, if you’ve been troubled, is to go to a new spot in your garden.
Wilt-resistant varieties should consistently be grown. They’re not entirely immune but only resistant, as the name implies.
However, they’ll give you a good crop on lightly infected soil and avoid a much more severe degree of wilt buildup.
A word to the wise: pot-grown asters often survive to wilt better than flatted stock. Root breakage at planting time leaves wounds where the fungus can penetrate the plant, and potted asters would have few broken roots.
Preventing Aster Yellows
Aster yellows are a disease that does not kill plants. It just causes stunting and flower malformation.
Sometimes half a flower, or one side of a plant, will be affected, turning whitish yellow. By itself, yellows have yet to act the first aster. It doesn’t come on the seed, resides in the soil, or drift through the air.
It’s a submicroscopic virus that grows in weeds. A pesky insect called aster leafhopper feeds on the weeds, picks up the virus in its saliva, then transmits the yellows to the asters during subsequent feeding.
How do you prevent aster yellows? A straightforward solution is to get rid of the weeds, which is a big help, even if done immediately around the garden.
A nearly vacant lot or field may harbor yellows, wherein you should endeavor to have the weeds mowed. It would be best to spray the asters weekly with DDT to control leafhoppers.
This must be thorough; it doesn’t take many hoppers to start a yellows infection. Commercial field producers build cheesecloth houses to keep out all the hoppers, and their worries are over. However, you should have good garden results through weed control and spraying.
Be sure to toss out infected plants immediately since they will only worsen and constitute a source for further spread.
Asters For A Splash Of Late Color
Asters are indeed fun to grow. We hope these notes will give you an idea or two for a better crop this year.
Try some of the long-stemmed branching kinds in the middle ground and background of your borders and, of course, in the cutting garden.
Incidentally, you can prune each plant to four or five shoots and disbud these as with mums or dahlias for exhibition asters.
These tall varieties give the border a splash of late color where perennials or even early annuals have faded.
Princess Bouquet, Queen of the Market, and other medium types make as fine a bedding show as you want, forming solid banks of color as early as August.
And although they are newer, you may be able to obtain sure of the dwarf asters for foregrounds and edging.
These short asters provide abundant material for petite bouquets in the house—asters, as cut flowers, last exceptionally well. In fact, they rival men for keeping quality.
44659 by Robert D. Wright