Spring flowering bulbs are the heralds of spring.
You can have these flowers in your home a month to 6 weeks ahead of those that will bloom outdoors by planting them in pots and caring for them for a few weeks.
Read Catalogs in Selecting Bulbs
Catalogs listing these beautiful flowers will be available soon. You should read these carefully before making your selection of bulbs.
Unpack Carefully To Prevent Bruising
After the bulbs have been received, unpack them carefully to prevent bruising. They should be planted in September and October at the latest.
If you do not plant them at the time they arrive, spread the bulbs out in a thin layer in a dry shady place such as in a garage or barn.
The bulbs grow well outdoors in any good garden soil. For force, a mixture consisting of one part good sandy loam, one part compost, and one part peat, gives satisfactory results.
To each bushel of this mixture, add a 4” inches pot of bone meal. After thorough mixing, store the mixture under cover until it is needed for potting the bulbs.
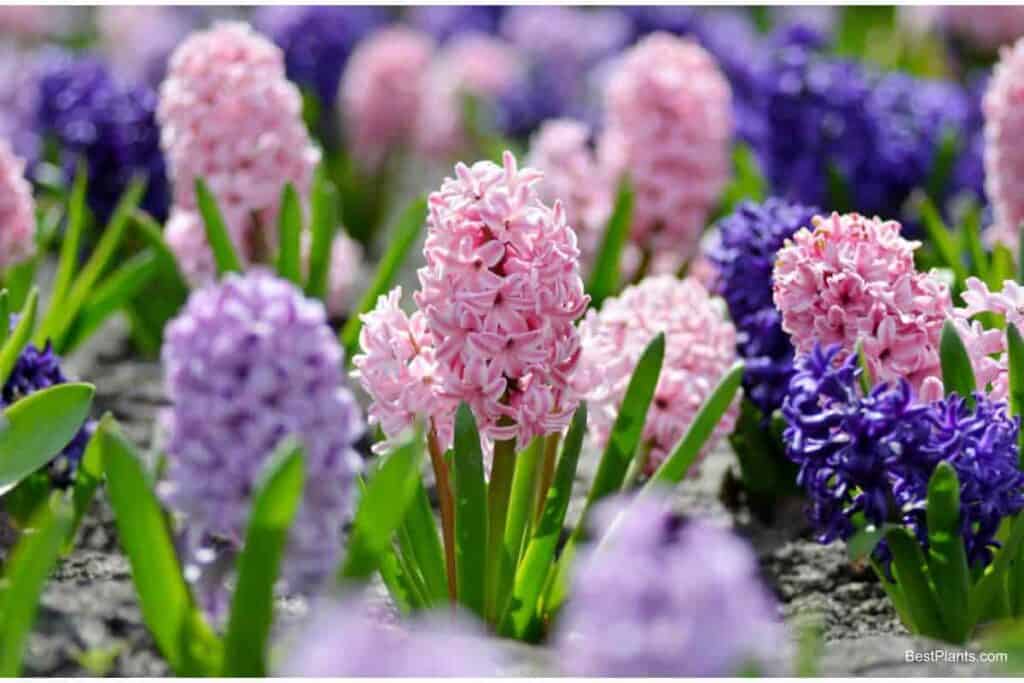
Placing Hyacinth Bulb In A Pot
Place one hyacinth bulb in a 4” pot, two in a 5” pot, and three in a 6” pot.
If you are planting tulips, plant three to five bulbs in a 7” pot and six to eight in a 10” pot.
Selection Of Bulbs
In all selections of bulbs, select those that are firm and in good condition.
It is advisable to use top (jumbo) size or first size bulbs for forcing. The second and third sizes are satisfactory for outdoor planting.
The bulbs should be barely covered with soil or with the necks projecting slightly above the soil in the pot.
Store The Pots In A Dark Place
After the bulbs have been potted and well-watered, store the pots in a dark place at about 50° until a well-developed root system is formed and about one inch of top growth has developed above the soil.
Remember that it is necessary to label all of the pots before placing them in storage so the varieties can be kept separate.
Storing Potted Bulbs
The bulbs may be stored in a cold frame, trench, or pit. Late-blooming varieties should be placed at the back of the trench and the varieties that will be removed first should be in the front.
It may be necessary to chip the pots out of the trench if the soil is frozen. In any case, be sure the trench is well-drained by covering the bottom with cinders or gravel.
Place the pots on this layer of cinders or gravel and then cover them with a 2” – 6” inches layer of sand, peat, corn cobs, straw, or evergreen boughs.
Over this should be placed about 6” inches of soil.
Cover The Upper Part Of Soil With Straw
The upper part of the soil should also be covered with straw. There is only one danger to watch for and that is mice.
It will take about six to eight weeks for sufficient roots to develop before the bulbs can be moved into the house for forcing.
If the roots are not filling the sides of the pots, the pots should be replaced in the pit and left until they have developed to this extent.
If the pots seem dry at this time, water them before returning them to the beds.
Remove The Pots From Storage
October 1 is about the last date for potting bulbs which will be forced in late December for January flowering.
Remove the pots from storage the last week in November and place them in a 65° to 75° degrees Fahrenheit temperature room.
The plants should be shaded for the first few days with a paper cone until the shoots have begun to grow. When the flowers show some color reduce the temperature to 50°.
For February and later flowering, potting may be delayed until the last of October.
Allow three to four weeks for the bulbs to flower after being brought indoors. Later flowering requires progressively less forcing time.
Wash The Outside Of The Pots
After removing the pots from the bed, be sure to wash the outside of the pots and give them a thorough watering before bringing them indoors.
About a week to 10 days and a temperature of 50° degrees Fahrenheit will be required before the foliage becomes green and the flower buds emerge.
Then the pots can be removed to the sunny part of the home where a night temperature of 60° to 65° degrees Fahrenheit can be maintained.
It is important to prevent the soil from drying out during the rooting and flowering periods.
It is also important to keep the water off the foliage to prevent disease and discoloration of foliage.
Timing The Blooms
To have a succession of blooms during late winter and early spring move a few pots indoors every 2 to 3 weeks. This will ensure a continuation of flowering.
Then you can replace those that have begun to fade or those that have ceased to flower.
Remember that those bulbs brought indoors later in the season will bloom much more rapidly than those brought in earlier.
Store The Pots In A Cold Frame
When the flowers have faded, store the pots in a cold frame until the weather is warm enough to plant the bulbs in the garden.
These bulbs usually will not produce outstanding blossoms the next year since two or three years are required for them to recuperate from forcing.
Common Trouble In Forcing Bulbs: Failure To Flower
Common troubles of forcing bulbs are their failure to flower and the flower stalks rotting off in the bulb. These troubles are generally caused by excessive heat and water.
Sometimes bulbs heated or frozen in storage show these same symptoms.
Unsatisfactory results in early forcing sometimes are caused by bringing the bulbs indoors too early before adequate root systems have been formed or by applying too much or not enough heat.
Pre-Cool the Bulbs
If you desire to force tulips early in the season, it will be necessary to pre-cool the bulbs for six weeks at 40° degrees Fahrenheit before storage.
This can usually be accomplished by placing the bulbs in a polyethylene bag and placing them in the lower part of the refrigerator. They should then be planted and stored for six weeks at 50° degrees Fahrenheit.
If the flowers are not needed until after January, there will be no need to treat the bulbs.