Question: I want to know about – how to force bulbs indoors. Recently, I inherited my grandmother’s bulb forcing containers and vases. I remember her forcing bulbs of grape-hyacinth, daffodils, tulips, crocuses, and amaryllis indoors every Christmas.
Unfortunately, my grandmother never shared her bulb forcing secrets. I would like to get an early splash of spring. Can you provide some answers? Katy, South Bend, Indiana
Answer: Forcing bulbs is great fun! Why shouldn’t you be among those who, each winter, enjoy the pleasure of having a midwinter display of spring bulbs – one of the easiest and most certain of all types of gardening? The simple ingredients are:
- A few bulbs
- A cool basement or cellar
- A sunny window
The procedure is simple, and the expense low. As the season for outdoor bulb planting draws to a close, obtaining the bulbs at a very considerable price reduction is often possible.
One should, however, beware of fake “bargains.” Only top-size, first-quality bulbs procured from a reliable source should be used for indoor bulb culture.
The list of bulbs suitable for growing indoors is long and varied. The beginner, however, will do well to start with only a half dozen or so different types – the sure-fire ones that they can scarcely fail with if a few simple directions are followed. These include daffodils, hyacinths, tulips, crocuses, grape-hyacinths (muscari), and snowdrops (Galanthus).
Essential Conditions For Forcing Bulbs Indoors
The essential conditions for successful indoor bulb culture are few. First comes light. The more direct sunlight, the better, but they can be grown with only a few hours of full sunshine, especially if these occur during the morning.
Next, come moderate temperature and a fair degree of humidity. Bulbs indoors will not do their best in a constant temperature of 70° to 80° and in the air from which a hot-air heating system has extracted all the moisture. (Such conditions, of course, are also detrimental to most other plants grown indoors.)
The undesirable effects of high temperature and low humidity can, however, be greatly offset by placing them at night where they will be cool (even down to 40°) by:
- Giving them all the direct fresh air possible when the outdoor temperature is above freezing
- Keeping water pans near them for evaporation
- Ensure that the soil in the containers in which they are growing is kept constantly moist.
- Placing the pots or bulb pans in saucers or a shallow tray and replenishing the water frequently enough to maintain it as nearly as possible to a depth of 1/2″ inch or so will usually keep them in good condition even in adverse surroundings.
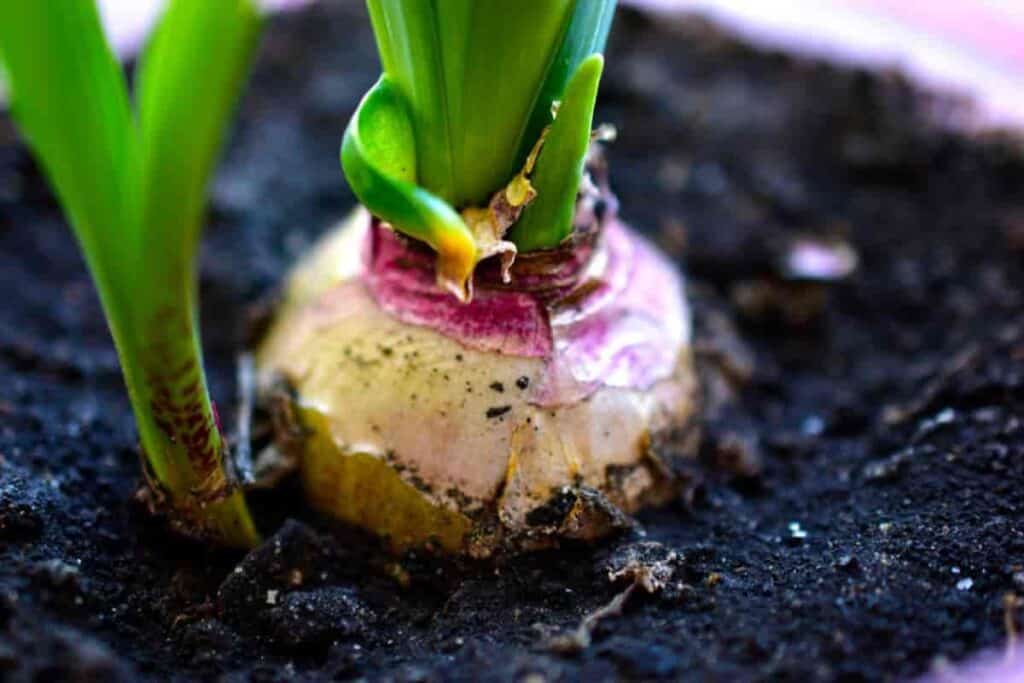
Daffodils The Easiest to Force
The easiest of all types of bulbs for growing indoors are daffodils.
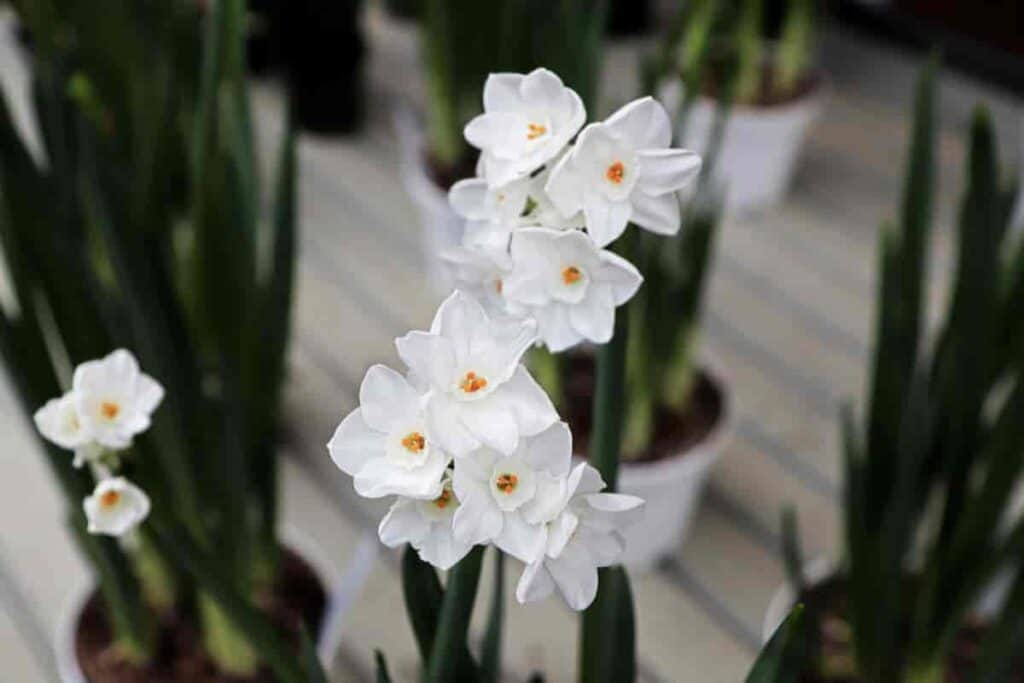
Quickest to come into bloom are the tender “bunch-flowered” varieties – paperwhite narcissus and its golden-yellow companion Soleil d’Or, both of which may readily be grown in pebbles (or vermiculite and water) without a previous period of root growth.
However, much better results may be had and much longer-lasting flowers by growing them in soil as recommended for other bulbs.
Hyacinths, too, may be grown in plain water or pebbles, but here again, you will get better results with soil. Don’t buy them in a mixture if you want pleasant, soft colors.
When it comes to tulips, one must be careful about selecting varieties. Many of the large-flowered varieties require a long period of pre-rooting and more exacting aftercare. Also, they take up much more space and are inconveniently tall.
Some catalogs specify which varieties are suitable for forcing, but even so, the beginner will do well to choose from among the early, less-robust-growing kinds.
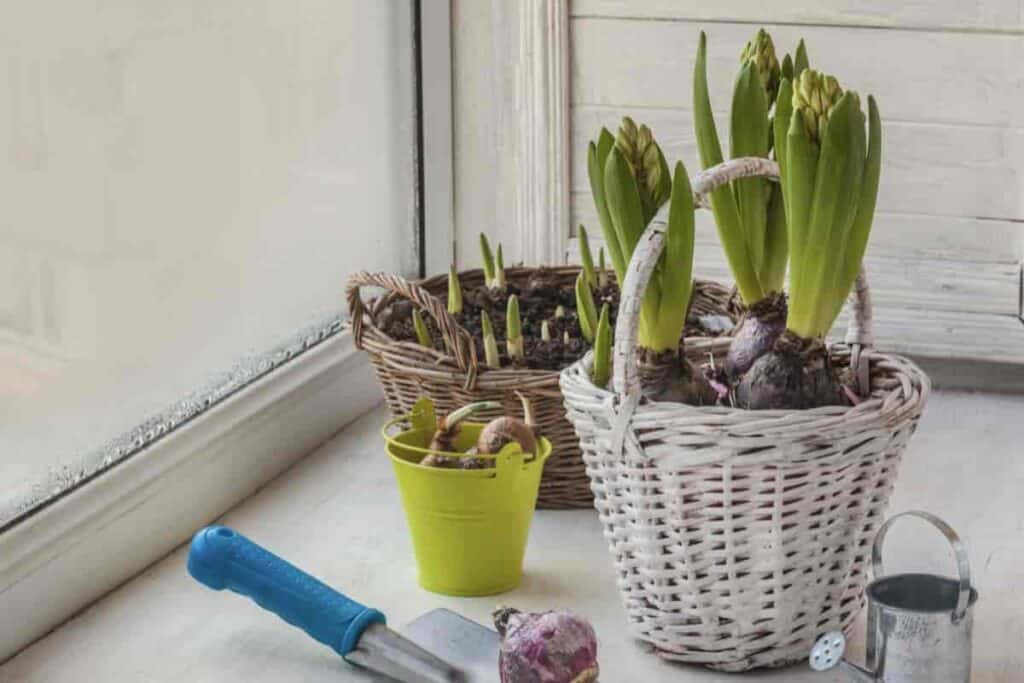
Forcing Potted Bulbs
The mechanics of growing bulbs indoors are not at all difficult. While flower pots will do as containers, bulb pans, which are merely shallow pots, are preferable because they are less easily tipped over.
Potting Soil
Ordinary good garden soil will serve as the growing medium. Quality bagged soilless mix at the garden center works perfectly, but I’ve seen better results with a compost made up of equal parts (by bulk) of garden loam, peat moss, and compost or well-rotted manure. (If soil is heavy, add enough sharp sand to cut it thoroughly.)
For plant food, add for each peck of soil (about 8 quarts) one pint of a mixture of two parts dehydrated manure and one part bone-meal. Mix all ingredients thoroughly and screen to get an even, light compost. This is the ideal soil, but good results can be obtained with plain, rich garden loam and dried manure.
Potting The Bulbs
In potting, place about an inch of coarse screenings in the bottom of the pot, and then fill half to two-thirds full of the prepared soil. Place bulbs close together – one half to one inch apart – and deep enough to be barely covered when the pot is filled to one-half inch or so of the rim.
Press soil firmly around them. Label each pot, so the label will stick up above the soil to fill the pots for the pre-rooting period. After planting, place pots in a pan or the sink and leave long enough to let the water soak up from below through the drainage holes until the soil’s surface is moist.
The potted bulbs are now ready to be moved to a cold frame or a cold, dark basement. The actual freezing or chilling period is not- essential, but the bulbs should have several weeks to make roots before top growth starts.
The regular method is to cover the bulb pans with 6″ inches or more of soil, but we find it much more convenient to fill in around and over them with peat moss or vermiculite, with a layer of compost (or soil) over this.
Cover the pots (except the daffodils) with wire screening where there is any danger of injury from mice. It is easier with this method to get them out when and as they are wanted.
Care After Sprouting
Care, after they are brought in, is easy. Give a good watering, and keep only moderately moist until top growth starts. They will not require direct sunlight until the tops are several inches tall. After that, the more direct sunshine, the better. Placing the pots or bulb pans in saucers kept half full of water is easier than watering from the top.
Above all, for a longer bloom time avoid excessive heat. The cooler they can be grown – even down to 55° and 60° – the better.
When the flowers have faded, keep the soil moist and the foliage green as long as possible. Then, when frost is out of the ground in spring, the bulbs can be set out in the garden for future bloom just as they are removed from their pots.
They should, of course, be covered 5″ or 6″ inches deep. Thus you will both have eaten your cake and still have it to enjoy in springs to come!
by G Rockland