When frosty weather comes in the fall, the house plants set out in borders, beds, or window boxes in the spring are too tender to leave outside and often too large to bring inside.
Now is the time to start taking cuttings of such plants as geraniums, begonias, coleus, plectranthus, sultana, and wandering Jew. They will then have ample time to develop a good root system.
Start those first that can be temperamental. If the first cuttings fail to root, it will not be too late to try a second time. For example, although not considered difficult, lantana and geranium sometimes turn black instead of rooting.
Sultana (impatiens), coleus, and plectranthus are easily rooted at any time. Succulents such as echeveria, ghost plants (Graptopetalum paraguayetzse), and aeonium should be fine if they are not overwatered.
You may want to take slips from Joseph’s coat, begonia, and arcsine (bloodleaf).
Starting The Cuttings
Some of these cuttings may be started outside if one has a frame in a shady spot. Mix at least half peat with the soil, or use half and half of the peat and sand.
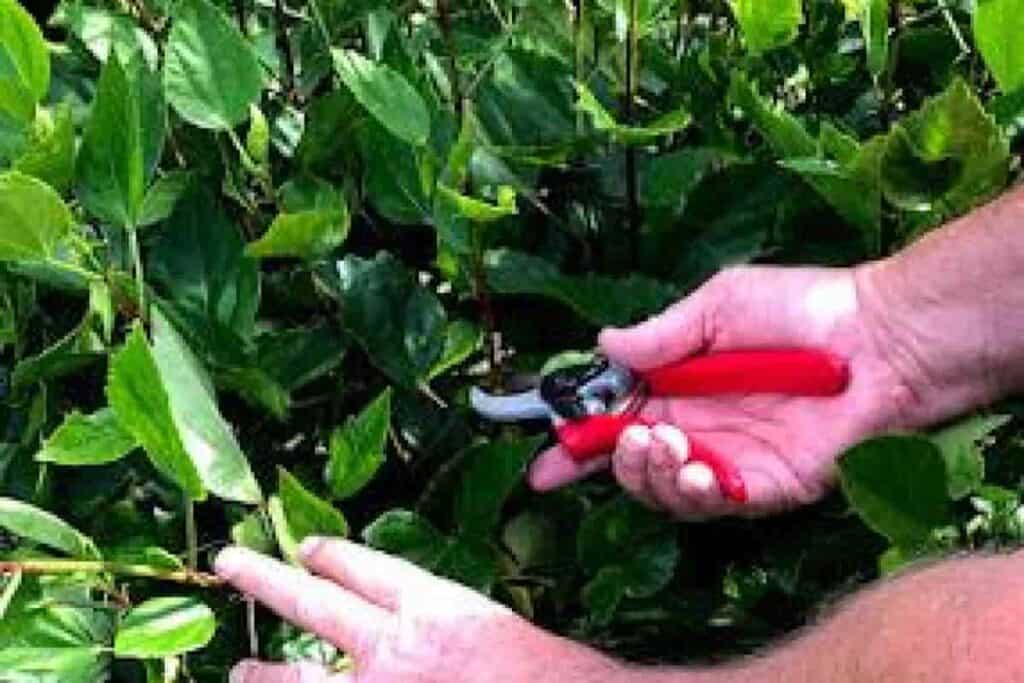
Stocky stems, those that have the least space between the nodes or joints (the places upon a stem which normally bear a leaf or whorl of leaves), make the best material with which to work.
A branch cut from the main stem can be used for a cutting. This is called a heel. A bit of the main stem should remain attached at the branch’s base. Or cut a stem about ½” inch below. Either kind will root.
Each cutting should have two or three nodes. Snip off all buds and flowers. Then, remove the leaves entirely from the lower one-third, which is the part that will be underground.
Leave the remainder of the cutting seems capable of supporting them, but if the leaves are rather large and seem inclined to wilt, they can be shortened, which is better than cutting off the entire leaves.
Medium Around The Cutting
Make holes in the planting medium with a pointed stick. Set the cutting into the hole up to the leaves that remain. Firm the peat well around the cutting. The medium must be kept nicely moist but never soggy wet.
If the weather is hot and windy, it is well to sprinkle the cuttings lightly several times a day, or better yet, set a glass jar over each or enclose the frame with cellophane or glass sash. A flower pot can be set into a plastic bag – held together at the top with a rubber band.
During hot, damp weather, remove the covering daily to prevent mold from forming. If the propagating quarters are sunny, they must be shaded somehow – burlap, newspapers, or lath frames.
Other mediums, such as sand alone, vermiculite, or a mixture of vermiculite, perlite, and sifted sphagnum, can be used. Instead of a frame, a leaky dishpan will suffice. A bulb pot, flower pots, or flats made from pound coffee cans or fruit lugs.
My mother used to root lantana successfully year after year with only a cracked gallon crock and garden soil.
She stuck short, stocky stems of lantana cuttings into the soil, firmed it well about them, watered, then set the container in a cool spot in the shade of spiraea bushes.
She tried to select a cool, damp week, but if the August weather turned hot, dry, and windy and the cuttings wilted instead of rooting, she pulled them up and started all over again.
Available Root Stimulants
Root stimulants in powder form are available. The bases of the cuttings are dipped into the powder, the surplus shaken off, and the cuttings planted in the usual way. If new leaves or shoots start to grow, it is a fairly reliable sign that the cuttings have rooted.
But if enough time has elapsed for root development and no new growth has started, pull gently on several cuttings.
If they are anchored to the soil, it is an indication that the roots have grown. It may take six to ten weeks or even longer.
Remove the jars or cellophane briefly each day to harden off the plants when roots have formed. After about a week, they should be ready to put into individual pots.
It is better to use small pots at first (but not too small as to crowd the roots) and report to the next size as the plant outgrows its pot or becomes root-bound.
Hardwood Cuttings
We may have wished last spring that we had more mock orange (Philadelphus) to make a picture planting with yellow columbines and yellow concolor lilies or enough space to hide the length of the unsightly fence.
A friend may have been enraptured by the delightful fragrance of our Russian olive tree or have seen its dreamy clouds of soft gray leaves by moonlight or artificial light and wished for just such a tree.
Not nearly all, but several woody things may be easily started from hardwood cuttings.
Here are just a few:
- Forsythia
- Deutzia
- Mock orange
- Spiraea
- Pussy willow
- Weeping willow
- Tamarix
- Russian olive
- Rosa multi-flora
- Grape
Spring Or Fall Cuttings
Cuttings taken in the early spring before leaf growth starts may root but not as successfully as those taken in the fall after the leaves have fallen or in early winter when the branches are not frozen.
The spring cuttings are too eager to start leaf growth and may fail to develop roots, in which event they die.
Those taken in the fall form a callus over the cut surface which is inducive to root formation. Use mature wood from the past season’s growth.
The stems are cut from 4” to 6” inches or more in length and should include at least two or three buds or nodes.
Make the cuts a quarter or ½” inch below a node and about the same distance above the top node. Make the bottom cut slanting and the top cut straight across; you will never have to try to guess which is the top and which is the bottom.
Tie them in bundles and bury them below the frost line in a well-drained location. Place a heavy mulch of straw over them.
I follow the methods of the authorities who advise having the bottom ends of the cuttings up while in storage, but one good authority advises just the opposite. He found that the easily rooted cuttings sometimes grow on the wrong end while still in storage.
I wonder if this would happen if the cuttings were buried outside but it would be possible if they were stored in peat, sand, or terra lite in a cellar.
Calloused Cuttings
When spring comes, the calloused cuttings are unearthed and set about 4” inches apart in a sunny part of the garden – one node above the soil surface and the end with the slanting cut down. I mound soil over them after planting.
Thus if the weather should turn dry, hot, and windy, it prevents the tops from drying out while roots are forming and before the leaf buds start to grow. When the leaf buds grow, it is time to remove the topsoil.
Do this during damp, misty weather, but remove it gradually if it must be done during hot, sunny weather. Then place a mulch around the cuttings to conserve moisture. Most cuttings grow enough to be set in their permanent places the following spring.
44659 by O Tiemann