The art of grafting has been known for over 2,000 years. In ancient times, those who knew this method of plant craft did not share their knowledge freely, for it seems to have been considered a mysterious process possible only by those who possessed the almost supernatural ability.
The object of graftage is to unite parts from two plants so that growth takes place and the two pieces form a union and become one.
Purposes Of Grafting
The oldest purpose of grafting may have been used to repair injured trees. But the critical use today is for the propagation of new or desired kinds of fruit trees or ornamental plants that, for various reasons, cannot be produced as well, or at all, from seeds or cuttings.
The stock is the part of the plant that provides the root system. Seedlings, roots, or rooted cuttings are used. The scion (SY-un) is the part inserted into or on the stock and will eventually make the top or central part of the new plant.
The Word “Grafting”
The word grafting is usually used when short twigs are used as scions and budding when a single bud is used. The stock and scion must be of the same or closely related genus or species. You cannot successfully graft an apple on maple. But peach will unite with plum.
Grafting is almost always done during the winter or early spring while a plant material is dormant.
Budding is usually a summertime project when the stock is in active growth but at such a time when the bark separates easily from the wood and the buds are mature enough.
Leaf Buds, Not Flower Buds
By buds, we do not mean flower buds but the new leaf buds which appear in the leaf axils during the summer and develop into foliage the following year.
As a general rule, the characteristics of each part, the stock and scion, remain the same, but there are cases in which there are changes – for example, the dwarfing of fruit trees when grafted on certain types of stock.
Most Homeowners Buy Grafted Plants
Most gardeners prefer buying fruit trees and other grafted material from a reliable horticulturist with skilled workers. But there may be occasions when the amateur wishes to try his skill.
Although the average gardener does not generally clone grafting, the procedures are such that anyone who has a desire (and is not too easily discouraged if first attempts fail) can master the methods.
Perhaps you have a favorite apple tree that is dying, and you want another like it. You find that it can no longer be obtained from a nursery. Or a neighbor has a choice tree but does not know the name.
In our case, we wanted for our orchard certain summer apples – a red and a sweet white apple – which grew in my father’s orchards but which nurseries could not supply.
We planted apple seeds in March in a seed frame to provide the stock.
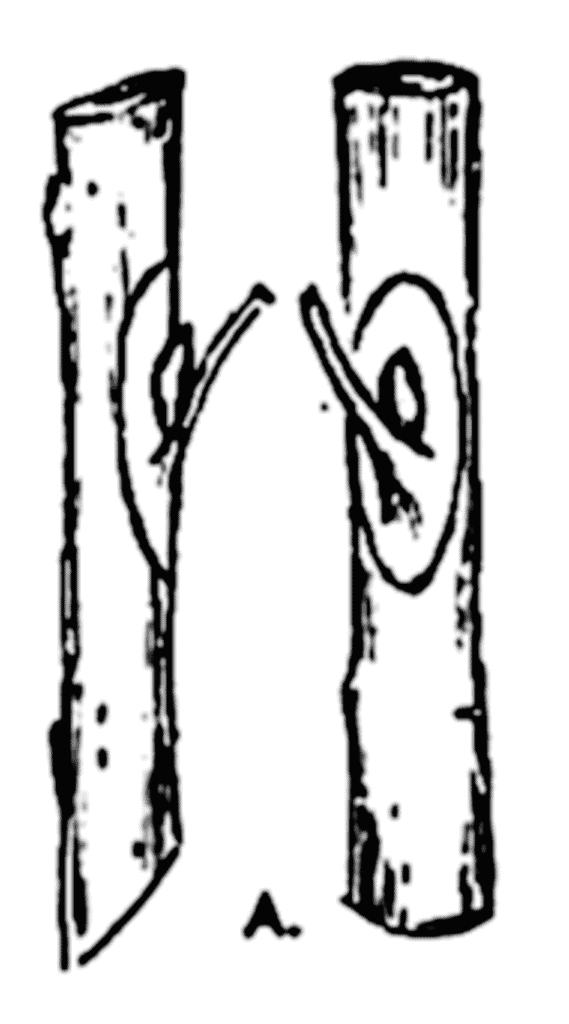
There are many grafts, but the whip or tongue graft is the simplest. The seedling trees were large enough the following March to make the whip grafts in this manner.
Grafting Begins
On a day when the temperature was above freezing, twigs, about pencil size, of the current season’s growth were cut from the sweet apple trees to provide the scions. These were placed in a plastic bag in the refrigerator.
A day or so later, when the soil was unfrozen so the little seedling trees could be dug, the actual grafting was done.
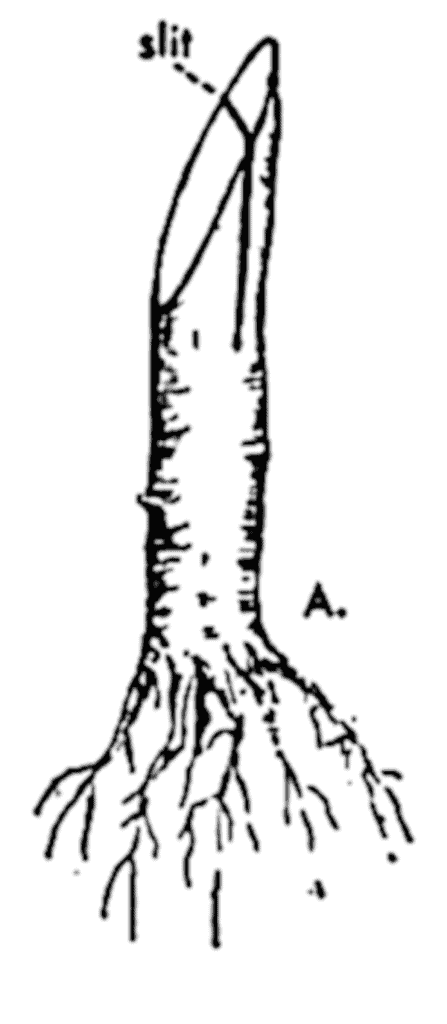
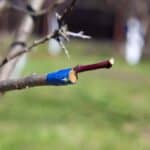
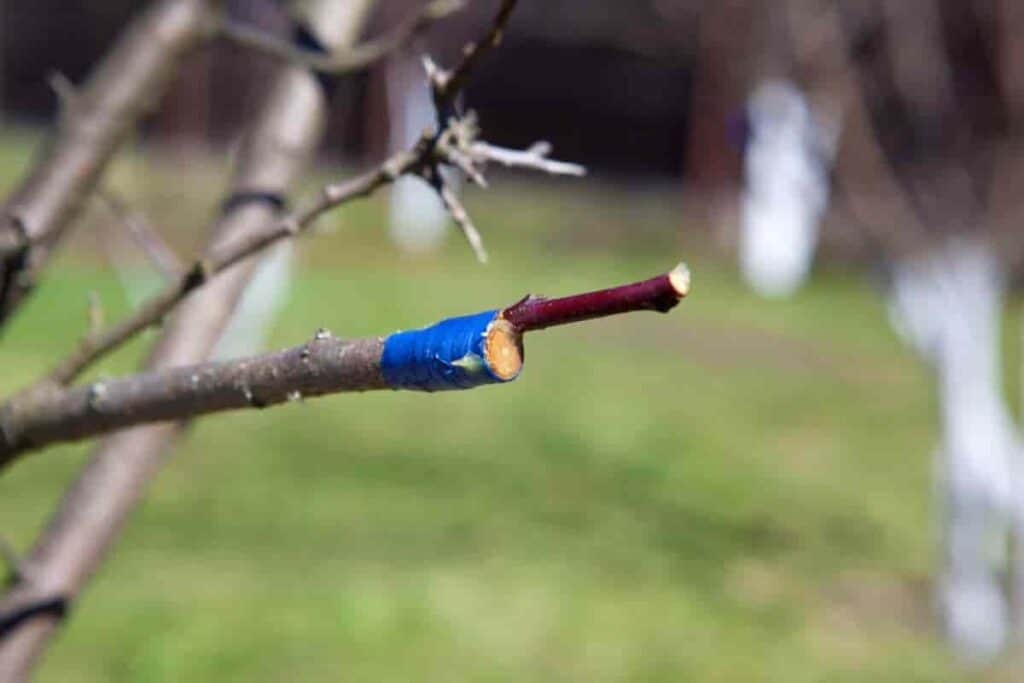
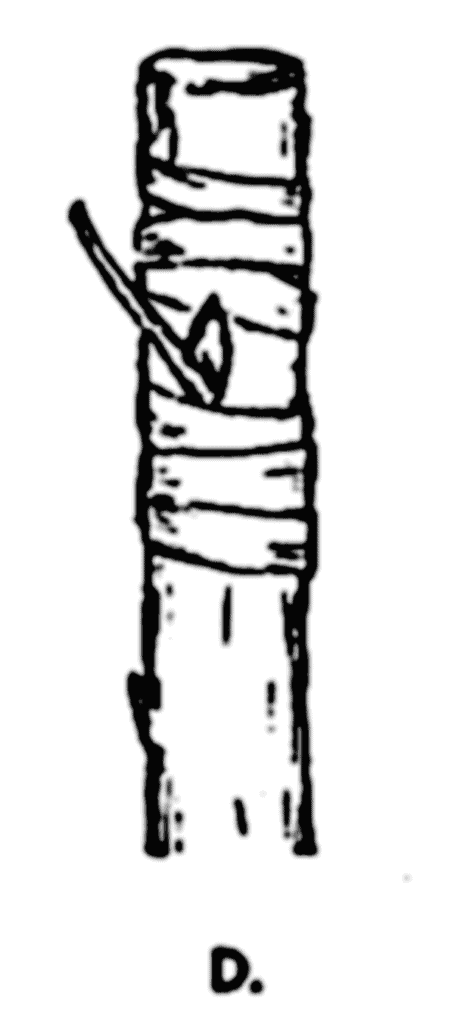
A diagonal cut about 1 1/4″ inch long was made on the lower end of the scion, and a similar cut about 2″ inches above the roots on the stock. There are special tools for grafting and budding, but we used what was at hand, which happened to be a sharp pocket knife.
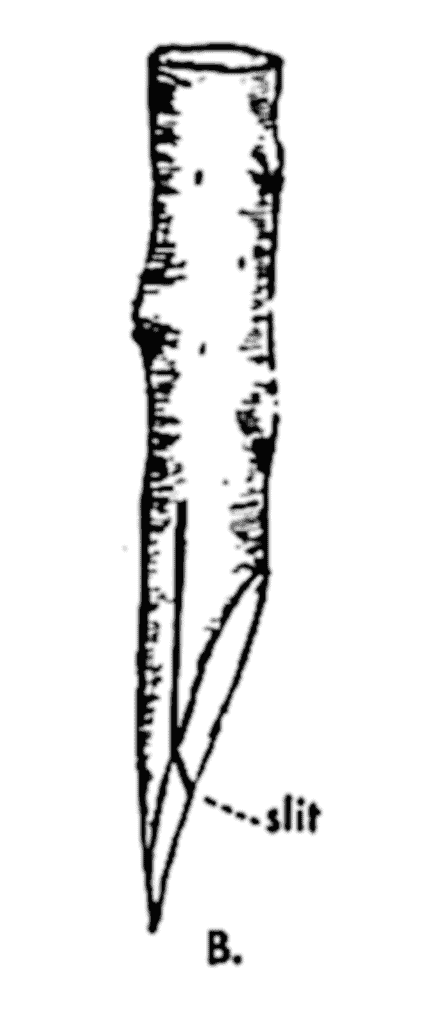
About a third of the way down, another cut was made on both parts. This formed the tongues and accounted for the name “tongue graft.” The stock and scion were then carefully fitted together with the tongues interlocking.
It is of utmost importance that the cambium layer (the green layer just underneath the bark) of both scion and stock are in close contact, at least on one side. If the parts are not the same size, it is impossible to have them touch on both sides.
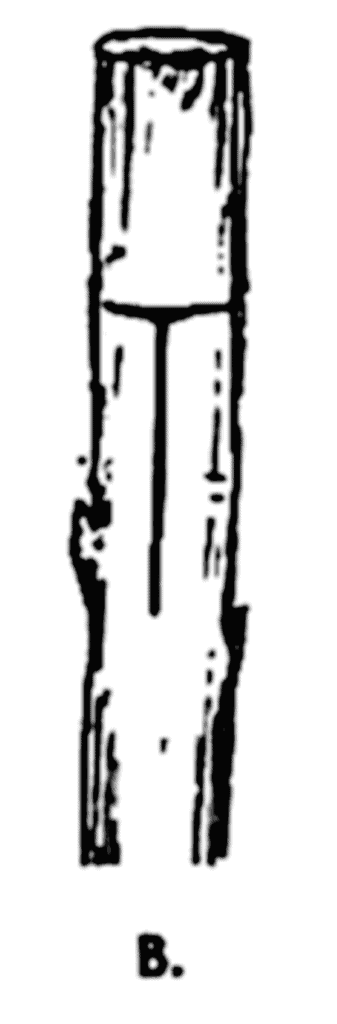
Adhesive tape was wound carefully around the graft, so the two parts were held in place, ensuring they did not slip apart while the wrapping progressed. A wax was heated enough to melt it and then spooned carefully over the tape and the part of the scion not covered with tape.
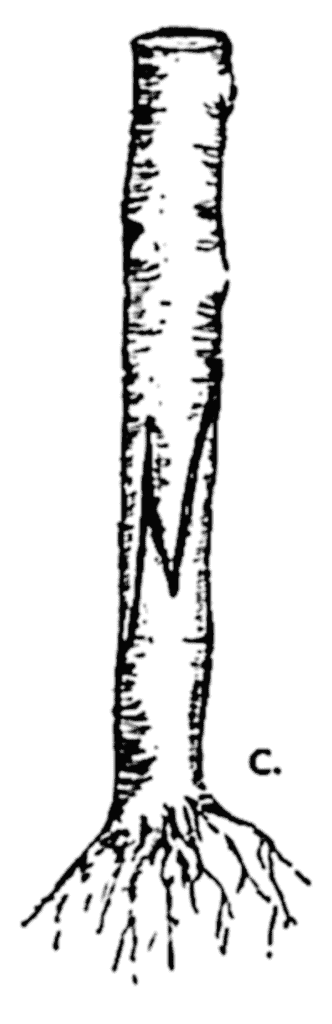
After the grafts were completed, the little trees were planted in the vegetable garden, where they could be watched.
The graft, or place where the union was made, was set below the soil surface. When the growing weather comes, the leaf buds will grow if the work has been successful. Our first attempts were not!
Remove All Growth Below The Graft
All growth below the graft must be carefully removed, for that will come from the stock and not the desired variety. If good growth is maintained throughout the growing season, the little trees will be ready to be planted in their permanent places the following spring.
Handle them carefully when digging and resetting so that the union is in no way pulled apart. While small, wrap the trunks each fall to protect them from winter injury by hungry rabbits. If you fail to get a single one to grow, plant more seeds and try again.
Rose-acacia (Robinia hispida) suckers badly but can be grown as a standard when grafted onto black locusts. Use a locust of one year’s growth about three feet high.
Proceed in the same way as when making a whip graft on an apple but instead of cutting the stock just above the root, make the sloping cut at the top of the stem.
We found that trees grafted outside without digging the locust stock did not “take,” but those that were explored, grafted, and replanted grew very nicely.
If you purchase a budded peach tree, shield budding will probably have been propagated. For stock, seedling trees not more than a year old are best. Budding can be done whenever the bark peels easily and there are mature buds to use.
This is usually during late July, August, and September. The bud is taken from a twig of the current season’s growth. A thin sharp knife cuts a shield-shaped portion of the bark containing the bud. Remove the leaf but leave a short end of the stem.
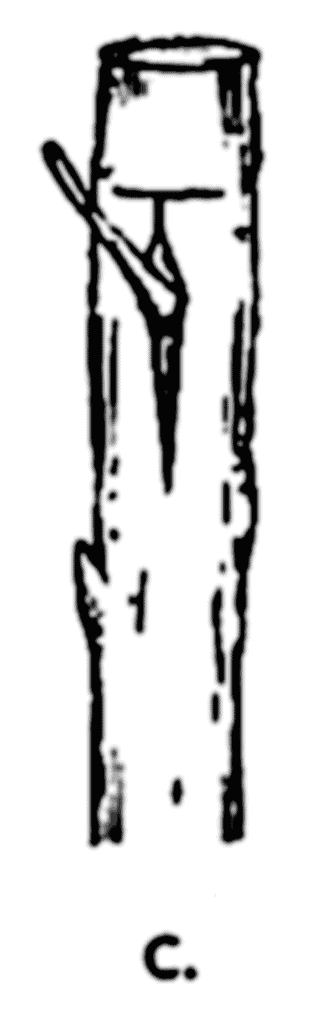
The T-shaped cut, about an inch long, is made on the north side of the stock near the soil surface. Cut just through the bark and not into the wood. Loosen the flaps of the bark at the top and insert the bud using the leaf stem to hold it.
Cut a flat rubber band and turn around the stock above the bud and several below. The ends of the rubber band should be covered with the first and last loops. This should hold the bud firmly against the cambium layer.
Buds that unite successfully with the stock remain plump and will grow the following year. Cut the branch back above the bud before growth starts, for it is from this single bud that the new tree develops.
44659 by Olga Rolf Tiemann