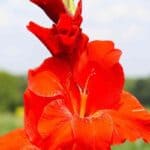
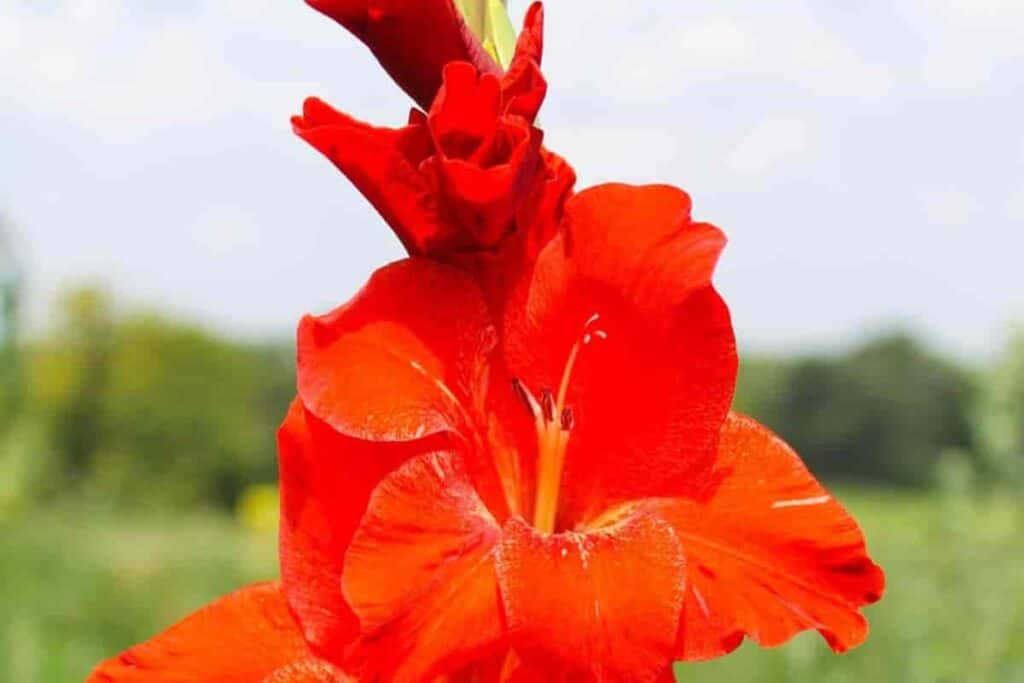
Whether you grow gladiolus for show or pleasure, you’ll want prizewinning beauties. So here’s my year-round plan for producing the kind of flowers you’ll be proud to display.
Growing Calendar
As your interest in growing glads increases, you will find that you can draw up your growing calendar.
This is how I plan my gladius year: With the floor around me covered with catalogs and my record book in hand, I spend a few of January’s cold evenings ensconced in a comfortable chair, selecting new varieties.
I grow approximately 8,000 to 10.000 bulbs (corms) and bulblets a year—some 400 named varieties and several hundred seedlings.
And as new varieties must be purchased each year to keep abreast of the improvements, a certain percentage must be discarded. Unfortunately, these are the varieties that can no longer win on the show tables.
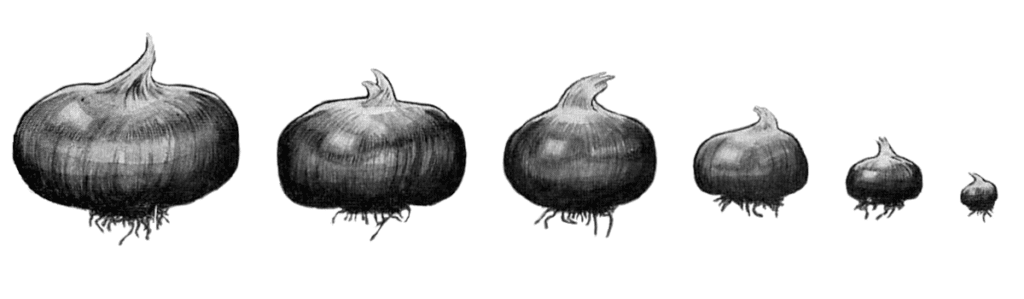
Most of the bulbs I order are medium-sized. These cost less than the large ones and will give nearly as large a flower spike in most cases. Then, too, the younger bulbs will produce better spikes over a longer period.
As a check, whenever the price makes it possible, I order a large bulb or two for comparison. This will also help extend the blooming period, making it easier to hit the show tables.
Where Gladiolus Growers Can Get Information
The state and national gladiolus societies are sources of all types of information for the gladiolus grower. In addition, through their membership lists, the catalogs of nearly all the commercial growers of North America will find their way to your door.
The suppliers who grow gladiolus bulbs as a specialty will guarantee they are correct to variety, healthy and disease-free.
In addition, the more progressive suppliers are now treating their bulbs with an accepted fungicide and DDT, making the former messy job of dipping bulbs before planting unnecessary.

Chores To Do During Early Spring Waiting Period
During the early spring waiting period between ordering and receiving bulbs, a few chores must be done.
First, that of renovating the supply of stakes. As the bulblets of a variety are planted at a different time and in a different place than the show flowers, two stakes for each variety are required.
I use wooden stakes (flinch stakes for bulblets, 12-inch for flowering size), painting them with a good grade of white paint, lettering the variety name and classification number with India ink, and varnishing over the area containing the information.
Another job that requires attention is getting the bulblet stock ready for early April planting. To obtain the most growth from bulblets by speedy germination, we pre-peel them, i.e., remove the hard outer husk.
Care in removing the husk is naturally essential to prevent nicking the meat of the bulblet itself. With a little practice, however, this is an easy job.
April 5
Beginning on the first of April, packages of bulbs begin to arrive. The packages and bags containing the varieties are opened immediately to allow the air to get to the bulbs.
Taking an inventory of the purchases, I generally find my suppliers are most generous in their overcounts and extras. Sometimes that new one you didn’t feel you could afford is there as a bonus.
The garden is roto-tilled as early in April as the soil is friable, and has been raked smooth and plotted off into the sections as I expect to use them.
I grow the 100-200 (miniatures and small decoratives) together in one area, the 300 (medium-sized), the 400 (large), and 500 (giants), each in their own space. This makes for easier identification.
Most hobbyists grow the gladiolus purely as a cut flower and not as a decorative border flower, and I am no exception. My soil is medium-heavy, nice and black, easy to work, and has the benefit of the full day’s sun with no interference from tree roots, bushes, etc.
I fertilize it differently in alternate years, with little or no difference in the results. Last fall as soon as the glads were dug and the ground cleared, I cultivated with my roto-cultivator and sowed a planting of winter rye, which serves as green manure.
With the addition of two years’ accumulation from the compost pile, the ground will receive no more fertilizing during the planting season.
Next fall the local farmer will deliver a load of cow manure to be spread and left rough over the winter for roto-tilling into the soil next spring.
May 15
In this latitude in the Midwest, the normal planting date for glads is about May 20. But, of course, they may be planted as early as April or until the middle of June.
Due to the coldness of the ground in April, we find the early varieties taking two to three weeks longer than normal to come into bloom.
The opposite is true with the late-planted varieties. To arrive at a specific blooming date, these factors must also be taken into consideration. Then, too, the size of the bulbs is important. A large or jumbo bulb will bloom ten days to two weeks ahead of a small one of the same variety.
Having charted the number of days to bloom and selected and sorted the varieties to plant, the “puttin’ ’em in” now requires attention—and will for six weeks. First, I measure up my plot to plant in double rows.
The double rows are 12″ inches apart and have up to 30″ inches between them. This makes for easier cultivation when the weeds start showing up. In addition, the 30- inch path space gives me ample room to operate my roto-cultivator, saving many hours of hoeing.
After my rows are measured up with stake and string, I use my little triangular hoe to soften up the ground and pull through my trench.
It is then quite simple to press the bulbs into the trench at the desired depth. After this, I use a rake to refill the trench and tamp down the earth.
June 15
By June 15, all bulbs are planted, but this is no time to sit back and survey our rows of stakes. The bulbs that went in early have sprung up and are now 6″ to 8″ inches high. A spraying program must be started and continued at two-week intervals.
I use a combined spray of 50% percent wettable DDT and chlordane, adding a little Karo to make it stick.
Spraying seems to come under the heading of “experimental” more than any other phase of glad-growing; for that reason, nearly all so-called experts have their pet formulas.
However, after a couple of doses of the above mixture last summer, I failed to find any trace of Mr. Thrips or any of his clan.
Hoeing and cultivating, particularly after rains have hardened the surface of the ground, have begun by now and will continue all summer.
August 1
As is typical during July and August, we find the rain department short on production. For the growing of good show-table glads, ample moisture for the bulbs in late summer is essential. Our 12-inch space between the double rows now begins to serve its purpose.
Again using the triangular hoe, I pull a trench through, banking up the ends. This gives me an irrigation ditch deep enough to hold considerable moisture.
Using the soiled soaker during these dry intervals of July and August, we furnish plenty of water for those big tall ones, which we’re always glad to have to stake up.
About this time also, I have a 5-yard load of old mushroom manure delivered for use as a mulch and side dressing.
Although most of the fertilizing value has been removed from mushroom manure, it still retains a fair percentage of nitrogen (according to the U.S.D.A. reports), and it can’t be beaten for keeping the ground cool at the plant bases, as well as discouraging weed growth.
September 15
By mid-September, our summer weekend trips to the various shows are but a memory, and the blooming flowers are nice for church bouquets. They’re from the medium and smalls that didn’t get around to the shows.
Though we’re still spraying to discourage Mr. Thrips from spending the winter with us (our neighbors grow very fine iris and peonies which are excellent host plants to the thrips), we must now begin our fall digging.
The bulbs can be dug from four to six weeks after they have flowered, and a garden inspection must be continued during this period to remove and destroy all plants that have prematurely browned up.
November 1
Because of my limited drying and storage facilities, I must keep the batches of bulbs going through as rapidly as possible in the late fall. Therefore, I have built several screen-bottomed trays out of 1×4 lumber during my spare time.
These are about 18×24 and are divided into four sections. As I dig a variety, I cut the tops close to the bulb and put the bulbs in the trays under the back porch to dry. The trays are also used for storing the gladiolus corms during the winter.
After two or three weeks, the bulbs are sufficiently dry to start cleaning them. The old bulbs and roots snap off nicely, leaving a clear scar on the new bulb base. Next, the tops, old bulbs, and roots are spread in the field until dry enough to burn.
The bulbs are then inventoried, dusted with a mixture of Arasan and DDT, and cured for a week in a dry 70° degrees Fahrenheit temperature.
They are stored in a well-ventilated storage room for the remainder of the winter (with the dust still on them). A temperature of 40° degrees Fahrenheit is ideal, but they must not be allowed to freeze.
It’s almost the end of the year again, and soon, the catalogs will be filling the mailbox, the catalogs that will remind us of those beautiful varieties we wanted so badly last summer during the shows.
Fine Gladiolus Varieties
Although several thousand very fine varieties are available today, it would be extremely difficult (and hazardous) to try to list the best of them.
However, here is a list of standard inexpensive varieties that would make a good basic start for anyone beginning this glad-growing hobby.
The varieties cover the general color classifications of the North American Gladiolus Council, and the figures following the variety names indicate the approximate number of days it will take a large bulb of that variety to bloom.
Here they are:
- WHITES and CREAMS – Silver Wings (88), Snow Princess (80), Leading Lady (87)
- YELLOWS – Wrinkle Cream (light) (86), Spotlight (deep) (88)
- BUFFS – Bingo (90)
- ORANGES – Daisy Mae (90), Gratitude (75)
- SALMONS – Victory Queen (light) (90), Dieppe (deep) (85)
- SCARLETS – New Europe (100), Valeria (85)
- PINKS – Phantom Beauty (light) (85), Pink Radiance (deep) (85)
- REDS – Hawkeye Red (light) (85), Red Charm (deep) (85)
- ROSES – Chamouny (light) (85), Burma (deep) (85)
- LAVENDERS – Elizabeth The Queen (86), Poet’s Dream(85)
- PURPLES – King Lear (75), Purple Supreme (85)
- VIOLETS – Blue Beauty (light) (75), Abu Hassan (deep) (77)
- SMOKIES – Dusty Miller (85), Oklahoma (90)
- ANY OTHER COLORS – Tony (90), Vagabond Prince (80)
44659 by Harold Durland