When you stop to think about it, a discussion on growing prize-winning gladiolus is quite similar to one on playing contract bridge.
Neither game is nearly as confounding as the rabid fan, all unknowingly, makes it appear to the beginner.
But, let the addict have his fun. By observing a few fundamentals, the rest of us will discover that what once seemed a great puzzle is easy.
Fundamentals Of Growing Gladiolus
In growing gladiolus, the fundamentals are the following:
- To obtain good corms of outstanding varieties
- To take care in planting
- To grow them in an average, well-drained garden spot
- To be willing to use the hoe
- To take ordinary precautions to keep plants healthy
- To think before cutting
- To provide for proper harvesting and storage of corms
Choose The Best Corm For Planting
Contrary to the prevailing belief among beginners, the largest corm is not always the best one.
The ideal is a young high-crowned corm. Generally, age and vitality may be distinguished by the old root base—the smaller the root base, the younger the corm.
The wise buyer often chooses a medium-size young corm rather than a large old one.
He will specify, “One-year-old corm, please, ” buying expensive new kinds.”
Be sure the stock comes to front a reputable grower or cataloger and that the corms are not only guaranteed free from disease and thrips but that they actually are.
Ideal Growing Conditions
Gladiolus is not too particular about where they grow except for a few details.
They should be planted in full sun and where they do not have to compete for food and water with tree or shrub roots.
While they like a lot of water, they do not tolerate wet feet. So if the only choice is a low-lying piece of ground and a gently sloping hillside, choose the latter.
The rule for fertilizer should be: Rather too little than too much.
Gladiolus prefer slightly acid soil and, generally, a fertilizer rather low in nitrogen and high in phosphate and potash should be used.
Many growers sprinkle fertilizer in the bottom of the trenches, covering it with an inch or so of the soil before setting the corms.
However, it is better to use no fertilizer at planting time and then apply a side dressing after the plants reach a height of about 6″ inches.
This is done because it is better to let the plants send down long shoots in search of plant food before it is actually given.
If it is too readily available, the plants are likely to become “lazy” so that the root system does not develop to a maximum.
Side-dressed fertilizer should be placed in a trench about 6″ inches on either side of the rows and then raked in.
Raking in is important. After the flowers have been cut, another side dressing of fertilizer will help develop a stronger corm for next season’s planting.
Gladiolus Bulbs For Next Blooming Season
Something for beginners to note is that the corm you will harvest and plant next summer is not the one you planted this summer.
Each year, a new corm forms above the old one and develops at the base of the growing plant.
How well that corm grows and how much energy it has stored will determine the quality of next season’s bloom.
Therefore, what is done for the gladiolus plant between flower cutting and corm harvesting is of utmost importance. Treat it well.
Good Planting Practice
In planting gladiolus, the bed should be well prepared to a depth of at least 8” or 10” inches.
Like most growing things, gladiolus responds magnificently to a soil well-enriched with humus.
Get this from well-rotted cow manure, a compost heap, or by turning under green cover crops.
This is simply good garden practice.
Planting may begin as soon as the soil is dry in spring. It may continue in most parts of the country until about the second week in July, later as we move south.
Large corms should be set in a trench, or an opening made with a bulb setter or trowel to a depth of at least 6” inches.
Small corms are not set as deeply. A good rule is to set the corms to a depth roughly four times their diameter.
Different Ways To Grow Fine Gladiolus Bulbs
The trick in growing extra-fine specimens is to plant deeply enough to discourage all growth except from one eye of the corm.
Many amateurs take pride in the fact that a large corm will often send up 2, 3, or even more shoots from one corm.
Of course, more corms will be harvested, and as many flower spikes as there are shoots may be cut from the original corm.
But quality suffers when a corm develops more than one plant—both the quality of the flowers and that of the new corms harvested.
So long as the corms make only one plant and produce only one new corm, the quality will remain high.
Deep planting also helps during the hot, dry part of summer, for the roots are then far enough in the soil to take advantage of added coolness and moisture.
Gladiolus respond readily to care while growing, using the hoe and garden rake frequently.
The soil should be kept loose and friable so that air may get down to the roots where it is needed. It also leaves a dust mulch to retain moisture.
If there is a choice between using the hose and the hoe in dry seasons, use the hoe!
A good mulch of dust is worth more than water alone. However, this doesn’t mean that the ground should be worked deeply after the plants are established.
It shouldn’t be worked to a depth of more than 2″ inches.
Otherwise, the many lateral roots will be cut off.
Fertilizer and water will both help produce the prize-winning strike of gladiolus, but it is the loose friable soil with the dust mulch that helps most.
Remedies For Gladiolus Pests And Diseases
Once upon a time, so the story goes, there were no thrips and few gladiolus diseases. Then came the thrips, and many growers gave up.
But the pests now may be combatted in several ways and without too much trouble.
Commercial growers may take their choice of any number of sprays and dips.
For the amateur who has started with good clean stock, he suggests that he use only DDT to keep the plants clean.
A 5% percent DDT dust or a spray made according to the manufacturer’s directions with either the 25% or 50% percent wettable powder will keep all thrips away from gladiolus if used every 2 weeks until the flower spikes appear.
For further precautions, dust the corms with a coating of 5% percent DDT dust after they have been harvested. This may be left on all during the storage period.
If plants are treated with DDT and kept growing properly, one can ignore the lengthy dissertations on disease and pest control and have better flowers.
Proper Stem Cutting Method
Before cutting gladiolus blossoms, remember that next year’s flower will be determined by the growth made in the new corm after the flower spike has come and gone.
Obviously, that new corm will not develop appropriately without plenty of leaves remaining to manufacture the plant food and keep the whole plant growing normally.
With that thought in mind, it is easy to see that the flower must be cut without taking away all the leaves—at least 4 good ones should be left.
Here are the following steps:
- Use a knife with a fairly small blade.
- Lay the blade against the flower stem well above the leaves.
- Run it down alongside the stem cutting through the upper leaves until within 6″ or 8″ inches above the ground.
- Then turn the blade into the stem, cutting it enough so that it can be broken and pulled up from the bottom leaves of the plant. In this way, at least 4 bottom leaves will be left for maturing the new corm.
We’ve often heard amateur gardeners say, “My gladiolus did so well the first year, but the same corms don’t seem to grow so well for me now.”
The investigation will usually show that the flower spikes were removed by cutting right across leaves with either a knife or, more likely, with a pair of shears.
Naturally, when no leaves are left, the new corm will not grow as well as it should and will be less able to withstand disease in its weakened condition.
Care in cutting the flower and deep planting to discourage all but one plant from each corm is important in keeping the stock healthy and high quality from one season to the next.
Harvesting Gladiolus Corms
Do not wait too long to begin harvesting the corms.
Usually, 4 to 6 weeks is needed for a new corm to form after the bloom is gone.
Follow these steps for harvesting:
- Dig the plants before they turn brown and cut off the old top with a knife or pair of pruning shears as close to the corm as possible just as soon as it is dug.
- Leave the corms to dry in a fairly warm place for about 3 weeks—not in direct sun.
- Then the old corm can be broken from the bottom and the new one dusted with 5% percent DDT powder and stored in a cool, dry place over winter.
- Store the corms in open trays or open bags.
- Do not use sand, peat, or other material because the air should be able to circulate the corms at all times.
Most gardeners plant gladiolus in open rows where they are grown for cut flowers.
They may also be used to highlight plantings in sunny borders or beds away from trees and shrubs.
When they are used in this way, the faded florets of each spike should be broken off individually as they wilt.
There will be good bloom from each plant with this treatment for up to 10 days.
If several corms of different varieties, either of similar or various colors, are used, this particular display can be maintained over several weeks.
When all the flowers are gone, the old spike can be cut off, thrown away, and the lower leaves left to mature the new corm until harvesting time.
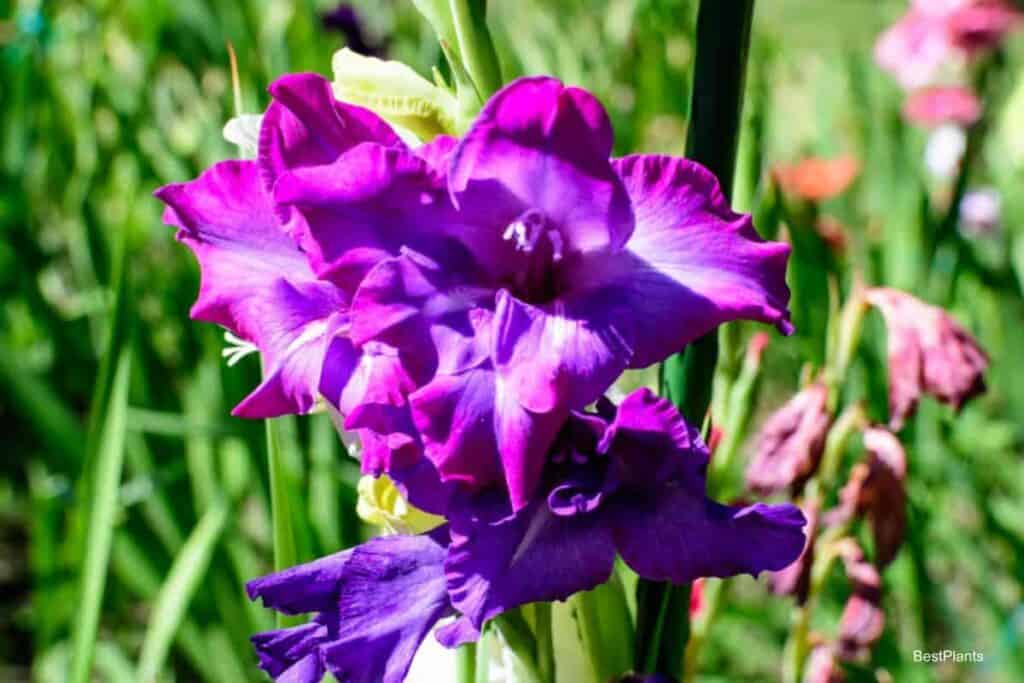
Different Varieties Of Gladiolus
To help the beginner select the better varieties of gladiolus from the many hundreds available this list of reasonably priced outstanding kinds is offered:
In white
- Silver Wings
- Snow Princess
- Annamae
White With Blotch
- Margaret Beaton
- Ariadne
- Salman’s Glory
Cream
- Leading Lady
- Lady Jane
- Shirley Temple, (will crook some)
Yellows
- Spotlight
- Yangtze
- Crinkle cream
Veecream is a very good light yellow with a beautiful red dart for home use.
Orange
- Daisy Mae
- Rio Rita
Salmons And Pinks
In the salmons and pinks there are literally scores of good kinds:
- Picardy
- Jeanie
- Glamis
- Pink Paragon
- Victory Queen
- Greta Garbo
- Pioneer
- Genghis Kahn, or Rosa Van Lima
Red And Scarlet
There are also many in the red and scarlet shades:
- Algonquin
- Stoplight
- Red Charm
- Ohio Nonpareil
- Black Opal (for one that is near black)
In Rose
- Miss Wisconsin
- Burma
Lavender
- Elizabeth the Queen
- Lavender and Gold
- Lavender Prince
Violets
In the violets or so-called blues, the old Blue Beauty is probably as good as any.
Abu Hassan is a darker-colored one, very striking.
In the smokies (those made up of a blending of several colors) one thinks of Buckeye Bronze (just the color the name implies), Tunia’s Ma-hornet (a huge plum-colored flower), Misty Dawn, and Sahara (sand-colored).
Purple Supreme is offered for purples in the average price class or the older King Lear.
Beautiful And Decorative Miniature Gladiolus
Attention should be called to some of the very useful and beautiful miniature and small decorative gladiolus.
These are particularly desirable for table arrangements and corsages.
In white, we have the following:
- Snow Baby
- Sub Deb
- Starlet
In yellow:
- Comet
- Fluffly Ruffles
In orange:
- Orangetown
- Flicker
In buff:
- The attractive little Filigree
In reds and rosy reds:
- Tweedledee
- Tweedledum
- Perky and Atom (probably the best new one)
Of late, some good small pinks have been brought forward. Among them are:
- Pink Ribbon
- Dolores
- Peri
- Dainty Miss
These are only a few of the available good large and small gladiolus.
Tastes will vary, but there is a type and color to satisfy every gardener and thrill every flower lover.
Make a selection of corms and let them produce their wealth of floral beauty for you.
There is nothing easier to grow well than the modern gladiolus.