
You certainly can be someone other than an expert in genetics. However, the experience will teach you many practical things about combining the characteristics of two different parents.
Two white glads, for instance, do not give all white seedlings. Neither will two ruffled parents give all ruffles, nor two tall parents give all high offspring.
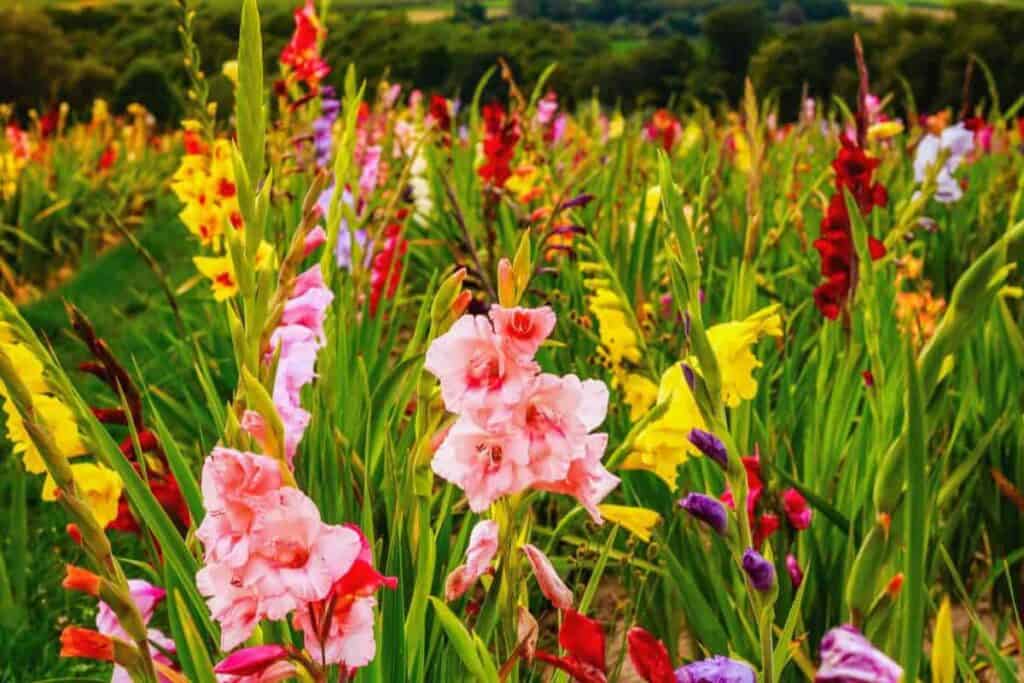
Before making my first cross, I knew what I wanted—a glad that would be beautiful, healthy, drouth resistant in the 300 size class (medium, with florets 3 ½” to 4 ½” inches across) with ruffled, wide, tightly-attached florets.
The plant should stand heat and wind. That was my ideal many years ago, and I’m still trying for it.
Find Flower Parts
The actual crossing of glads is quick and simple. First, examine the heart of a gladiolus floret. You will see the three stamens that carry the pollen and the pistil with three feathery prongs.
When pollen from some other glad flower’s stamen is brushed across the pistil’s prongs, the flower is “crossed.” It takes several days to see if the seed pod at the base of the floret begins to swell, indicating that the cross has “taken.”
I cross early in the day when there is little wind, and the florets and pollen are fresh.
I look at all the glads that are open or nearly so and decide the cross I want to make, remembering my goal and mentally noting what I have to work with as parents.
The floret on the mother plant must be wide open, but the floret on the pollen parent need not be. I remove pollen from the first unopened floret of a bloom selected for the male parent.
This is called “green” pollen. To do it, use ordinary, pointed tweezers, insert them into the floret, and lift out the stamen without injuring the unopened flower.
Then with the tweezer, slit the stamen, slip the point gently under the pollen, and lift it out—place pollen on the three prongs of the pistil selected for the mother. Care is needed not to bruise either pollen or pistil.
I pin the pistil up against the top petal with a toothpick. This keeps it out of the way of insects visiting the flower. I usually cross about four florets on one plant, all the same cross.
Then I tag the mother plant with a number and record the number in my notebook with the names of the two parents, putting the mother first: ‘Orange Gold’ x ‘Valentine,’ for instance. If the pistil is well coated with pollen, it is unnecessary to bag or cover the floret for protection.
Varying Results
Sometimes seed pods seem full to bursting. Other times there will be no seed, only trash.
When a cross fails to take, there is no pod at all—sometimes the weather is to blame, or perhaps one of the parents is naturally sterile. Some glands produce no viable pollen.
Seeds ripen in about 21 days. I gather the pods as the tops begin to split—otherwise, the seed may be lost. After drying the seeds briefly, I store them until the next spring in envelopes marked with the number of the cross and the parents’ names.
The second phase of glad hybridizing is seed planting, which begins in our area in late April or early May—as soon as the soil is warm.
I prepare an outdoor bed 3’ feet wide and as long as needed for my seed, with rows spaced 8” inches apart and thickly sown. The soil should be rich, loose, and well-drained.
Cover the seed ½” inch deep, sprinkle the surface with water, then cover with newspaper or burlap to keep the top from drying. After a week, remove the cover and begin looking for glad sprouts.
They resemble little blades of grass and will continue to come up for 20 to 30 days. Keep them weeded and watered. The planting is successful if three-fourths of the seeds come up.
A few seedlings may bloom in the first year. Virtually all will form bulbs which, when replanted the next spring, will bloom the second year.
The first fall, I carefully dig and store every seedling bulb, regardless of size, for anyone might be that elusive champion I’ve been looking for.
Watching First Blooms
When your seedlings begin to bloom, you’ll have daily excitement as each new plant opens flowers first and must undergo your selection process. It’s hard to be ruthless.
I rate my seedlings by the kind of plants they make—I want them healthy, heavy-foliaged, and green. Any that don’t measure up are pulled at once.
Bloom spikes should be tall, straight, and strong because I live where the wind blows. I like clear and spotty colors—personal preferences will count here. I consider the length of the flower spike, the form of florets, and how they are placed on the spike.
Small bulbs may not give a true picture of these bloom characteristics, so if in doubt, I let them bloom a second year before deciding.
There is one further consideration: how well the corm propagates itself—it could have all the good attributes, but if it has no cormlets around it when dug, I may discard it—for I cannot get more of it.
Cormlets are the only source of other plants like the original. If a seedling isn’t pulled out and discarded in the first bloom season, I tag it with the number of its cross and give it another number indicating that it is worthy of a second chance.
I consider myself lucky if I find one glad in a batch of seedlings that even approaches my “dream glad.” But the lure of further possibilities keeps me busy daubing pollen year after year.
44659 by Theresa Dillard