Come a pleasant morning in late April, and I am reminded that it is time to prepare my dahlia beds to receive the tubers which have previously been divided. By the 10th of May, if the weather permits, it’s planting time in my garden.

At this time of year, spring-flowering shrubs and perennials are blooming around the edges of our hillside property in which the dahlia beds occupy the central spaces on each of nine terraces.
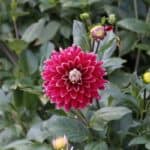
Actually, the garden looks like a multi-tiered stage waiting for our favorite flowers to sprout, grow and perform with their many-colored petals and variety of forms.
Stakes Go In At Planting Time
The beds are long rectangles, 3′ feet wide, and of various lengths. A double staggered row of stakes is set in each bed, running the long way, one foot in from each side.
The stakes are carefully lined up 4′ feet apart, with the aid of two guidelines.
These beds running parallel with a grass path of 2’ and ½’ feet between each bed, provide an air shaft of 4’ and ½’ feet from the staggered poles of one bed to the staggered poles of the next.
This arrangement makes for easy working among the plants later and for good air circulation.
It uses stakes varying from three to 6 feet in length, depending on the nature of the growth of the different kinds of dahlias in my garden.
Each bed holds from 16 to 30 firmly-set stakes.
Poles Are Tagged
Placing the poles 4′ feet apart allows two tubers to be planted near each pole, one on either side.
However, if you wish to plant one tuber to a pole, space the poles 3′ feet apart by setting the stakes before planting. Injury to the tubers is avoided.
To facilitate planting, I divide the number of different varieties of tubers, write the names on labels, place them in flats, and then proceed to plant.
Blending Of Colors
The blending of colors in the various beds is a particular concern of mine, as I like each to have the appearance of a huge bouquet at the end of August and September.
The heights of the varieties must also be considered. All poles are tagged, and a label is attached to each with small screw eyes, 6” inches from the top of the stake.
5”-inch plant labels, which have received a coat of flat white paint, are ideal for marking the varieties with Stafford’s indelible ink.
Set Tubers Horizontally
In planting, I use a 6-inch garden trowel to make a generous 6-inch hole in the front and back of each pole.
Then, after softening up the soil in the bottom of the hole, a handful of a half-and-half mixture of bone meal and a 5-10-5 fertilizer is worked in.
Planting The Tubers
In planting the tubers, each is set horizontally with the eye about one inch from the stake and directly in front of it at a 30° degree angle toward the grass path.
Each tuber is covered with 3” or 4” inches of soil after it has been run through my fingers to sift out stones.
When doing this, be careful to protect the tender shoots from damage.
Partially filling the hole, which we call cupping, allows the tender shoots to emerge from the soil easily, and develop rapidly without forcing their way through a tightly-packed surface.
As each plant grows, the holes are filled in level with the ground to prevent rot. Always avoid packing the soil over the eyes of the tubers, and never hill up the plants.
Tall Kinds Need Topping
No water should be given to newly planted tubers; however, green plants require watering when they are set out.
Plants with a ball of soil are set so that the top of the ball is about three inches below the ground’s surface.
They should be left with a slight cupping for a few days, during which time they are watered. Then the soil should be filled in level.
After two or three sets of large leaves have developed, the plants are topped – the tall varieties low and the short varieties high.
However, we never top the miniatures and pompons. They are encouraged to grow more or less wild so that the blooms will be small.
With the large varieties, four main stems are the aim; growth is controlled by removing some of the laterals.
Trimming For Large Blooms
Here and there, for show purposes, we trim them down to two stems and later disbud to encourage large blooms.
Since the buds appear in groups of three, pinch out the two laterals, and save the one in the center; or, if one of the lateral buds looks better, save it, and discard the others.
Also, pinch out the potential branches from two of three sets of leaves below the terminal burl to obtain long stems.
In fact, we remove all growth except that which develops from the last set of leaves on each lateral.
Spraying Should Be Regular
As soon as the sprouts are above the ground, the plants are sprayed with an insecticide containing rotenone and pyrethrum, and the practice is continued weekly throughout the season.
It is important to spray regularly since some insects are not easily visible, and plants may be attacked before one realizes it.
The insects that attack dahlias include aphids, the green, red and black types, found in clusters on the sterns, around the buds, and on the undersides of leaves.
Corn borers drill holes into the stalks and cause them to drop and break off.
Leafhoppers {small, greenish-yellow, flying insects) suck plant juices from the undersides of the leaves, causing their edges to turn yellow and brown before becoming brittle.
The tiny red spider mites also work on the leaves’ undersides, bringing a gray appearance with a webby covering.
In severe cases, a red spider makes the foliage dry and pale green; it may also develop a sandy appearance. Both leafhoppers and red spiders are prevalent in the hot, dry weather of summer.
Burn Mosaic-Infested Plants
Mosaic, a constitutional disease caused by a virus and supposedly carried from one plant to another by sticking insects, is controlled by applying contact sprays to the insect,
Mosaic-infected plants show general mottling or yellowish or pale green bands along the mid-veins or branch veins of the leaves.
Complete Yellowing Of The Younger Leaves
In some varieties, there is a complete yellowing of the younger leaves. In addition, foliage may be rough, blistered, crinkled, curled, or distorted, and the plants may be stunted.
Since infected plants never recover, they should be destroyed by burning; root division and cuttings from them are also worthless.
Mildew generally appears in the fall and is readily controlled by dusting both sides of the lower leaves, particularly with dusting sulfur in the morning or evening when they are slightly damp.
One application is sufficient at the end of August.
44659 by Dr. Alexander Edgar Nash